Have you ever wondered how to edit a specific part of an image for a preview without ruining the original image? Well, there is a hidden technique in Photoshop that offers just that—layers. Starting from professional to beginner, learning how to use layers to edit photos in Photoshop is essential for creating stunning and precise edits.
Layers mainly allow you to stack different parts of an image on top of each other. This means you can make changes, add effects, and try out different edits without permanently changing the original image.
But as a beginner, it is not uncommon for you to get overwhelmed with the different options in the layer panel in Photoshop. Don’t worry—you’re not alone!
In this guide, we are going to explore all about different layers, how they work, and the easiest Photoshop tutorials for layers. Let’s get started.
What Are Layers In Photoshop?
Layers are an important component while editing in Photoshop. It is like transparent sheets of your image where you restore the elements, effects, text, shape, or additional image for use whenever you need. These types of sheets are placed on top of each other to work on the different elements of your image.
You can have separate layers for text, shapes, photos, and adjustments for an image. The major benefit of layers is non-destructive editing.
No matter how many changes you will make to your image, it won’t permanently change the underlying layers. Rather, this adds flexibility to your editing process. You can reposition them, add new elements, or remove unwanted objects in your Photoshop image without affecting the rest.
Types of Photoshop Layers You Should Know About
There are several types of layers you will find while editing in Photoshop. Here are some common types of layers you should know about:
1. Text Layers:
Text layers mainly contain text elements you can add and edit within your image. You can adjust font, size, color, and other text properties on these layers.
2. Image layers
This is the common type of layer that actually stores the actual pixel information of your photos or imported graphics. You can edit, paint, and adjust the image data on these layers.
3. Fill layers:
Fill layers are a great option for creating backgrounds or adding flat color elements. These types of layers allow you to fill an area of your layers with a uniform color, gradient, or pattern.
4. Adjustment Layer:
This is a special kind of layer that you can use to modify the color and the contrast of your image. The biggest advantage of it is that it allows you to make changes without affecting the pixels.
5. Video Layer
These layers are mainly used for animating and painting. In the layers panel, you will find the video layer identified with a filmstrip icon. These layers allow you to edit the individual frames of a video.
6. 3D Layer
If you’re working with 3D elements in Photoshop, these layers will contain all your 3D object information. You can adjust the position, lighting, and material properties of your 3D object on these layers.
How To Use Layers To Edit Photos In Photoshop? [Beginners Guide]
Here is a beginner-friendly guide highlighting all the techniques in the easiest ways on how to use layering to edit images in Photoshop. Scroll down!
1. Creating and Naming a Layer
Let’s start our Photoshop layering tutorials with the very basics! This is the primary step where you’ll start editing by creating layers and naming. There are several methods to apply if you want to add layers in Photoshop.
Simply go to the layer panel. You will find the layers panel on the right side of the workspace by default. If it’s not visible to you, open it by going to Window > Layers in the top menu.

Now click on the menu bar on the right-hand side of the panel and then select New Layer. As a shortcut, press Shift+Ctrl+N on Windows or Shift+Ctrl+N on Mac.
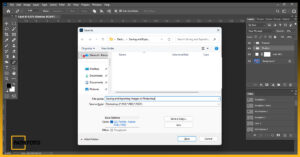
You will find a dialog box pop up on your screen:

- Enter a descriptive name for your layer in the Name field.
- Now, adjust other options like the blending mode and opacity if you want.
- When done, click OK and create the new layer with your chosen name and settings.
2. Duplicating a Layer
While editing, there will be many cases when you want to add components to your images, but if you want to work on them individually, you need to duplicate a layer. This allows you to edit the layer without changing the original image. Duplicate layers are often used to create masks and achieve specific blending effects.
Anyway, here are the simple steps you can follow to create duplicate layers in Photoshop:
First off, select the layer you want to edit. Now, there are two ways to access the menu option:
- Go to Layer > Duplicate Layer from the top menu bar.

- Or click on the menu from the Layers panel and choose Duplicate Layer.

- You will find a Duplicate Layer dialog box on your screen.

Name it or choose the destination from the Document dropdown menu. Click OK and duplicate the layer in your chosen location.
As a keyboard shortcut:
Press Ctrl + J for Windows or press Command + J to quickly duplicate the selected layer.
3. Merging Layers
When you’re working with lots of layers in Photoshop, it is not uncommon they will slow down Photoshop’s performance. Each layer in your project holds different data, which may have chances to crash if you do not properly maintain it. In such cases, merging some of the layers can benefit you and allow you to work with ease.
Here is how you can do so:
- Select the layers that you want to merge. Simply hold down the Ctrl (Windows) or Command (Mac) and click on the layers to select them at once.

- With the layers selected, go to the Menu and choose Merge Layers to merge your selected layers.

Use the keyboard shortcut: press Ctrl + E for Windows or press Command + E if you’re using Mac. This is the fastest way to merge selected layers.
Note: Make sure all the layers you want to merge are visible by clicking the eyeball icon next to each layer in the Layers panel. Alternatively, right-click anywhere in the Layers panel and select Merge Visible.
4. Stamping a Layer
This is a great option to apply when you’re working with multiple layers. Stamping layers allow you to combine all your selected or linked layers into a new layer while leaving the original image intact. It mainly creates a copy of your layers where you edit freely without affecting the original content.
Most often, this technique is used for creating masks. You can adjust the opacity and blending mode, or use masks on the stamped layer to isolate elements for further editing.
Anyway, here is the simple process to stamp all your visible layers:
- Go to the Layers panel.
- Press Shift + Ctrl + Alt + E for Windows or Shift + Command + Option + E. for mac.

- A new layer will combine all your visible layers in the layer panel.

Now, to stamp your selected layers:
- Press Ctrl + Alt + E in Windows or Command + Option + E for Mac.
- A new stamped layer will be placed on top of the existing selected layers in your Photoshop Layers panel.

5. Coding Layers With Colors
When you’re working multiple layers at once, the best chances are the layers panel can become cluttered and difficult to navigate. As a quick solution, you can color code certain layers to differentiate them from others while you’re editing.
It is great for your quick visual identification and makes it easier for you to find specific layers within your project.
Here is how to color code layers in Photoshop:
- Right-click on the layer that you want to define. Or, Control-click on Mac to select. At the bottom of the context menu, you’ll see a set of colored squares.

- Choose any of your favorite colors to add to your layer.
You can also color code the layer when you’re creating a layer. Select the Color option from the layer pop-up message and choose a color.

[Note: The color coding is purely visual, and it won’t affect the layer’s functionality.]
6. Reordering Layers
While working with layers, in many cases you may need to move layers for various purposes. Reordering the layer is the fundamental technique in Photoshop that allows you to reorganize your layers panel as your own without losing any information. You can group related elements together and place them together.
Just click and hold the mouse on the layer that you want to move and drag it to the new position. Release the mouse button when the layer is positioned at the desired location.

7. Flattening Layers
Flattening layers in Photoshop is all about merging all the visible layers in your image into a single background layer. This effective option allows you to combine different editing data from your individual layers into one flat layer. Even the best part is that it is quite easy to do.
- Simply Go to the Layers panel. From the menu bar at the top, choose Layer > Flatten Image.

- You can also find this option of the Layer at the top menu bar of your photos. After flattening, the newly created layer will be named “Background” by default.

- Double-click on the name and rename it if you want.
8. Linking Layers
Linking layers in Photoshop is a great technique when you want to move or transform multiple elements of different layers at once. The elements underneath the linked layer will move or transform the same way when you are moving one layer. This is useful for things like:
- Text and its drop shadow. For example, moving the text automatically moves the shadow.
- Multiple shapes that form a composite element. For example, moving one shape will help you move the others.
To link layers, here are the simple processes to follow:
Step -1: Use the Ctrl key or the Shift key and select the layers that you want to link.

Step -2: Click on the chain icon from the bottom menu of the layer panel. This will link your selected layers.

Step 3: Now that, whenever you move this one layer, the link layer will move or edit at the same time.
9. Deleting a Layer
Imagine a thing like that, you’re editing an image with a layer and suddenly find that it doesn’t work. Then deleting that specific layer is the only thing to do to continue your editing.
Don’t worry! It’s even easier to delete a layer in Photoshop:
- Go to the Layers panel and select the layer you want to delete.

- Click the trash can icon at the bottom of the Layers panel. It’ll look like a small trash can and say “Delete Layer” when you’re hovering over it.

- As a keyboard shortcut, press Delete Key in Windows or Delete key in Mac to delete a layer.
10. Locking and Unlocking Layers
When you’re creating a layer, you’ll find it locked by default. But if you want to unlock that specific layer,
- Select the locked layer.
- Click on the small lock icon right next to your layer name in the layer panel and unlock it.

Again to lock a layer:
- Select the layer you want to lock.
- Click on the lock icon and lock your layer.

How to Use Photoshop Layers for Creative Editing? [More Advanced Techniques to Know!]
Well, that’s all about the layer editing technique that you can apply in your Photoshop editing. But that’s not the end of here. Here are some advanced techniques you should know if you truly want to become a master of the use of layers in Photoshop. Let’s start!
1. Adjusting the Opacity of Layers
In Photoshop and in many other editing software, opacity is an effective option through which you can make your layer element transparent or visible, whatever you want. By adjusting the layer, you can control how much of the layers below it are visible through that layer.
For instance, here are some major factors you can note down:
- 100% Opacity: This is a completely opaque layer. It will fully block the visibility of any layers below it and you can see the elements of your current layer.

- 0% Opacity: This is a transparent layer, which means all layers below it will show through completely. But the current layer itself becomes invisible.

- Now if you are setting layers with opacity between 0% and 100%, they are like translucent shades. In real time, you can see some of the elements, but they’re partially hidden by the shade.
Now to adjust the opacity of a layer:
Select the layer you want to adjust. Click on the Opacity option and drag the Opacity slider to adjust it.

Slide it to the left to decrease opacity or to the right to increase. As you move the slider, the layer’s transparency changes in real-time.
2. Changing the Blending Modes
Beyond just opacity, blending modes are another great option that you can use to get the best control over your layers. It mainly controls how your layers interact with each other and creates a variety of effects on your final image.
Think of it like, you have two layers in Photoshop, a background layer and a layer on top. Blending modes determine how the pixels in these overlapping areas will combine to create the final image you see.
To access the blend mode option,
- Go to the Layer Panel and choose an option from the Blend Mode from the drop-down menu.

- Or, go to Layer > Layer Style > Blending Options. Now choose a blending mode option.

- Every time you change the option, see and check how they are appearing in your image. When done, click OK and finalize it.
3. Clipping Masks
When you want to achieve a specific effect based on the shape or content of another layer, you can add a clipping mask to your specific layer. This is even a powerful technique you can apply in multiple adjustment layers to make them stacked above the same layer.
Anyway, here is the simple process to create a clipping mask using the layers panel:
- First of, you will need two layers in the panel. One is the base layer, which defines the shape or image. Another one is a clipped layer, which contains the image or content.

- With the clipped layer selected, press and hold down the Alt key. Or, press the Option key on Mac.
- Now, click between the “clipped layer” and the “base layer” in the Layers panel. By doing so, you’ll find a cursor with two overlapping squares.

- When done, release the Alt key.

4. Creating Group Layers
Layer groups in Photoshop are more likely folders for your layers. Think of it like you have an image project in Photoshop with numerous layers for different elements.
Layer groups allow you to categorize these layers into specified groups. Like “Text Elements” and “Background Adjustments.” This makes your layer interface clear and easy to navigate. There are several ways to create group layers in Photoshop. The simplest one is that:
- Select multiple layers and right-click, then choose “Group from Layers.”

- A dialog box will pop up.

- Finally, Click ok or you can give your groups descriptive names for easy identification.
FAQs
Can I use clipping masks with layers?
Yes, you can use clipping masks in Photoshop. Place the shape layer below the image layer and right click on the layer and select “Create Clipping Mask” from the drop-down menu. This is how you can make the clipped layer visible where there are non-transparent pixels on the “base layer.”
Can I combine edits from multiple layers?
Yes, you can combine edits from multiple layers in Photoshop. Simply merge the desired layers together using the “Merge Layers” option in the Layers panel. Or you can use the shortcut Ctrl+E or Cmd+E on Mac.
How can I use layers to create a photomontage and collage?
It’s easy to create a photomontage or collage in Photoshop using layers. Place images on separate layers, adjust their positions and sizes, and blend them together using layer masks and blending modes.
How do I hide a layer in Photoshop?
There are a couple ways to hide a layer in Photoshop. Go to the Layers panel and find the layer you want to hide. Now click the eye icon next to the layer’s thumbnail in the Layers panel.
How To Layer An Image In Photoshop?
It is simple to turn an image or photo into a layer in Photoshop. Just drag the image file from your file explorer and drop it directly into the canvas area of Photoshop. Photoshop will automatically add a news layer, which you can resize, move, or edit as you need.
How To Add A Background Layer In Photoshop
If you want to add a background layer in Photoshop, go to Layer > New > Background From Layer, and that’s all. Any transparent areas in the layer will be filled with the current background color.
In Closing
Well, that’s all here about how you can ensure the best use of layers to edit photos. No matter if you are just a beginner in photo editing or a professional, learning all the essential layers is essential if you want to streamline your image editing process. Beyond just saving your time and efforts, this will ensure you the highest-quality images possible.
Hope our effective guide will be enough for you to learn all these things in the easiest way. Still, if you are stuck at any point, don’t hesitate to reach out to us. Our Photoshop experts are always ready here for your best assistance.