Photoshop is renowned as an industry-standard software used for comprehensive image editing. From that sense, having queries about how to edit photos in Photoshop for beginners is quite obvious, especially for those new to the platform. The same was also daunting for me when I first started using Photoshop, as the vast array of tools and features can seem overwhelming at first glance.
But fret not! with proper guidance and a step-by-step approach, even a beginner can create stunning images by learning the fundamentals of Photoshop. This includes cropping, straightening, resizing, color adjustment, exposure correction, sharpening, or erasing unwanted spots that can transform an ordinary photo into a visually captivating image.
In today’s guide, I’ll walk you through all these essential photo editing techniques in Photoshop with a very clear & beginner-friendly explanation so you can easily get into it.
How To Edit Photos In Photoshop For Beginners? [12 Basic Steps To Know!]
Photoshop is a comprehensive software packed with a vast array of tools but enough user-friendly and intuitive to use.
Follow my step-by-step instructions on how you photoshop a picture and learn beginner-level tricks to transform an image into a captivating piece. Let’s roll up!
- Upload Your Image In Workspace
First off, start with the very basics. All you need to arrange your workspace where you will edit your photo. For instance, you will have to know how to import an image in Photoshop. It’s so simple than you think:
Click File>Open and upload any of the downloaded images in your workspace from Photoshop. Or as a keyboard shortcut, press ctrl + O.
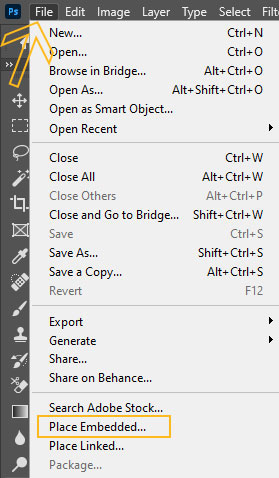
You can either open an existing image that you have already work in Photoshop. Just go to File>Place Emebeded> and then select your desired image.
- Cropping And Resizing Images
Cropping is another most basic task to do in Photoshop which mainly distracts any specific elements from an image. Cropping also allows you to remove unwanted areas from an image and improve the overall composition.
Then coming back to Resizing this is key to a good-looking image. As a beginner, you may need to resize your image when you want to change the dimensions of an image to fit specific requirements.
Anyway, though the task is quite basic and you can do it with any mobile-friendly software, you can make it more enhanced in Photoshop:
Here is how to crop images in Photoshop:
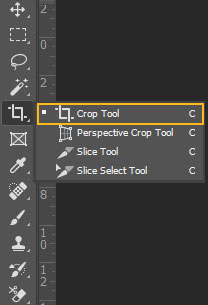
- Once you’ve uploaded the image, select the crop tool in the toolbar.
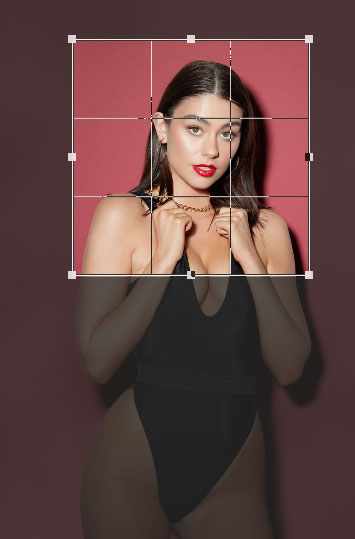
- Click the corner of the image and drag the edges as you want.
- You can hold the shift key while dragging to keep your aspect ratio the same.
- Finally, press Enter or click the checkmark in the control bar to finalize the crop.
To resize an image:
- After uploading an image in Photoshop, go to Image from the top bar menu.
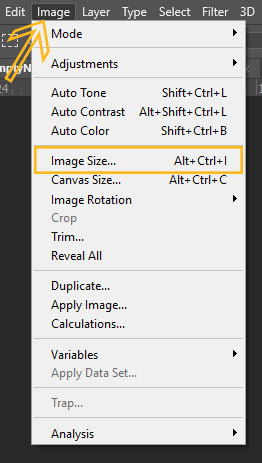
- Select the “Image Size” from the drop-down option.
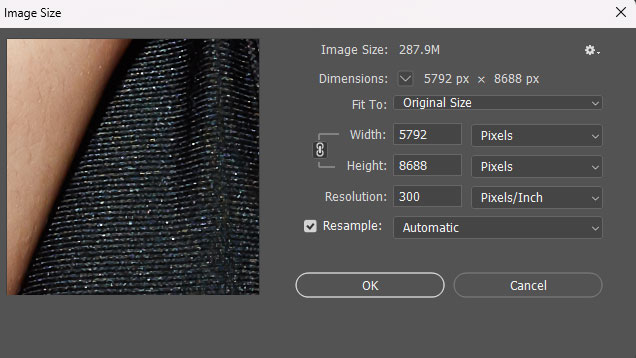
- An image Dialogue will pop out on the screen. Select the Width, Height, Fit To, Constraint, Dimensions, and Resolution as your own.
- Click OK and finalize your image size.
- Straightening And Rotating Images
Whenever I use a handheld camera or mount it on a tripod, it’s common for my camera to be slightly tilted or not perfectly level. That obviously results in a crooked or skewed image. I bet you’re not out of this row!
But don’t worry! Straightening the image in Photoshop will easily correct this tilt and align the horizontal/vertical elements properly. Here’s how you can straighten your image:
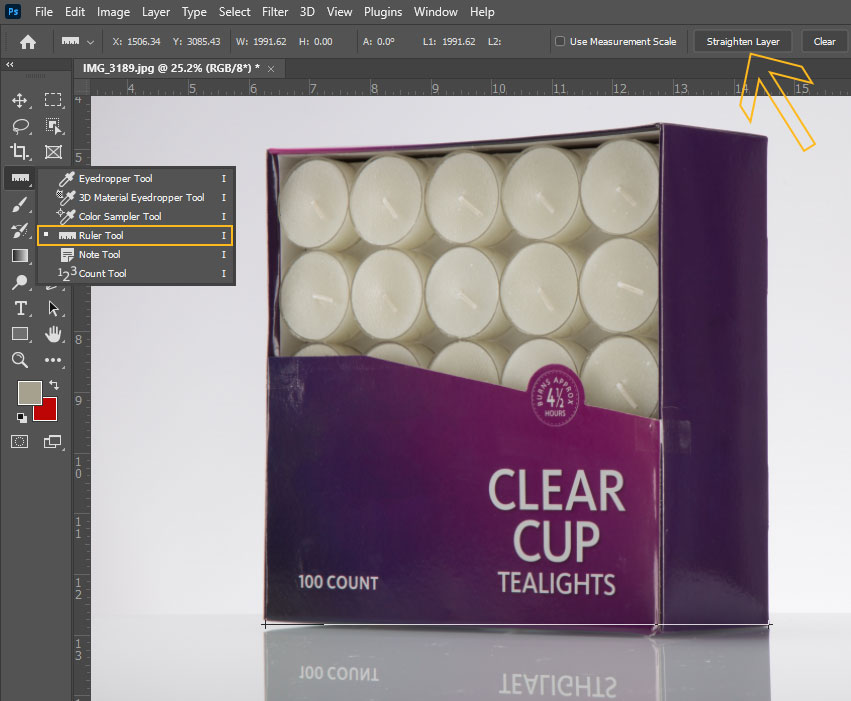
- Go to the toolbar and select the Ruler tool from the toolset. In many Photoshop versions, it will be hidden behind the Eyedropper Tool in the Tools palette.
- Once selected, find out the area of your image horizontally or vertically that you want to straighten.
- Now with selecting the ruler tool, start drawing a vertical or horizontal line on that area.
- When done, click on the “Straighten Layer” from the top bar and the selected area will automatically be straightened without much distraction.
- To erase any distractions, you can utilize the Marquee Tool and make your straightened photo look much better.
Then when you want to rotate an image,
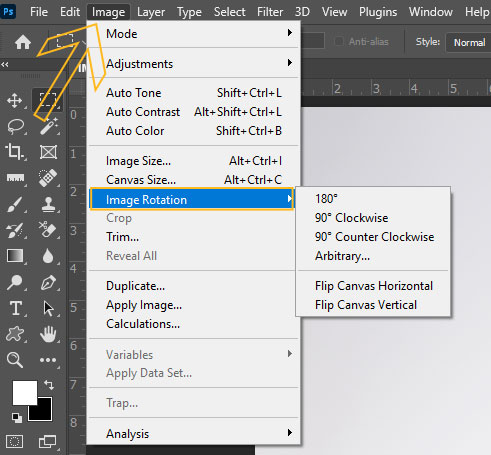
- go to Image > Image Rotation.
- Now select the rotation option either 90 degrees clockwise or counterclockwise to 180 degrees.
- You can even select the different degrees you’d like to rotate your photo in Photoshop.
- Getting The Correct Exposure
After capturing an image, we most often end up with the image slightly under or over-exposed which affects the image quality. But Photoshop has got you covered here as well. It offers the easiest way to change the exposure of your image and let it set you as your own.
Getting the correct exposure is also important to ensure that the image has the right balance of highlights, midtones, and shadows. This helps to maintain the detail and prevent distractions due to high or low exposures.
Well, there are a few effective tools in Photoshop to correct the exposure of an image. For instance:
Camera Raw:
This is the most effective tool in Photoshop to adjust an image if it is incorrectly exposed. The tool functions by keeping your image in a previous raw format.
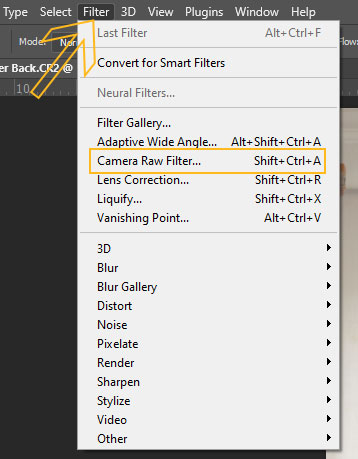
With the image open, go to the Filter from the top menu.
Find and click on the Camera Raw Filter and your images will open in the Camera Raw workspace. Instead, you can use the shortcuts Shift+Ctrl+A.

When done, follow any of the methods below to correct the exposure:
Method#1: Creating An Exposure Adjustment Layer
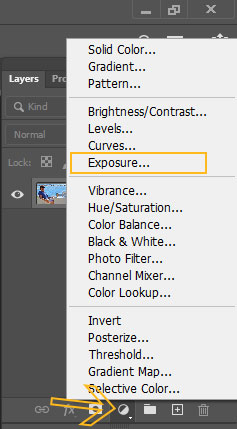
- Click on the “Create new fill or adjustment layer” icon and create the Exposure adjustment layer.
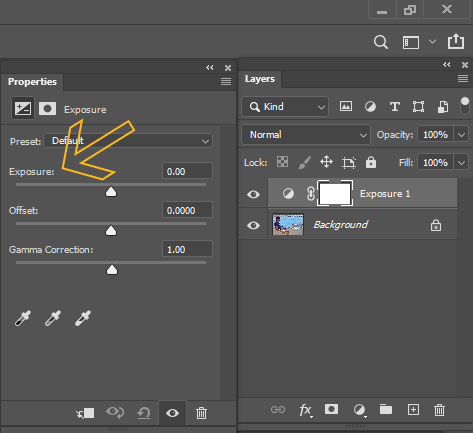
- Choose “Exposure” and an Exposure slider will pop up on the screen
- Simply slide the exposure left or right and adjust the exposure as you need.
Method #2: Creating A Brightness/Contrast Adjustment Layer
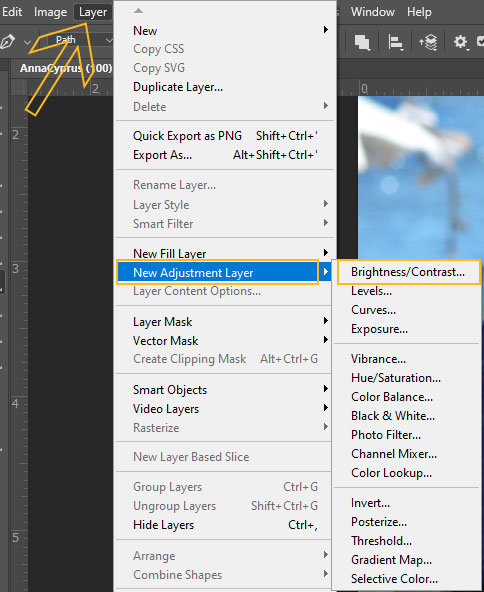
- Go to the layer and click on New Adjustment Layer.
- Then choose Brightness/Contrast.
- Now slide the brightness slider left or right and make your photo lighten or darken as you want.
- Creating A Duplicate Layer
While working in Photoshop, at times, you may need to back to your original photo as it was before editing. That’s where the necessity of creating an image background layer enters.
Typically, with every image opened in Photoshop, there is a base layer automatically. Users need to make a duplicate layer to edit images in a non-destructive way.
Think of Photoshop layers like a stack of sheets.
Here the top sheet covers everything below it. If the top sheet is opaque, it is obvious you won’t see through it to the sheets beneath.
But if the top sheet is transparent or semi-transparent, you’ll be able to see the sheets below it, with their contents for the transparency of the top sheet. This makes your photo editing process far easier as you are quite transparent when you need to go back or delete an edit at once.
However, to make a duplicate layer:
- Import an image in Photoshop.
- Now go to the layer and right click on the background layer.
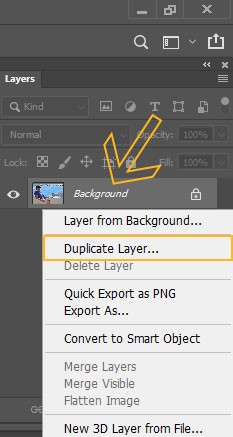
- Find out the duplicate layer option and click on it.
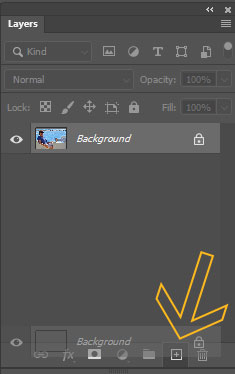
- You can also create it by dragging the background layer on the [+] on the bottom menu bar.
- Make Color Adjustments
Think of it like you have an image with color casts or tints, such as a yellowish or bluish tint. This is a normal situation a bad lighting condition, white balance settings, or the camera’s sensor.
But luckily Photoshop offers an effective color adjustment feature that will help you to neutralize these color casts and restore them in a more natural and accurate form.
Also, as a photo editor like me, you may want to enhance or boost certain colors in an image to give it a vibrant look. In this instance, you can utilize the color adjustment tools in Photoshop and adjust the saturation, hue, or luminance of specific colors as your own.
However, there are a few ways to make color adjustments in Photoshop:
- All you need to first make a color adjustment layer so that you can alter your edit.
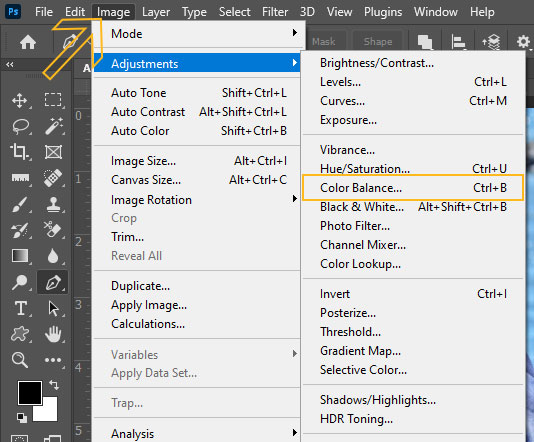
- Now go to the Image>Adjustment>Color Balance.
- From the pop-up color adjustment window, adjust the color of your image using the slider.
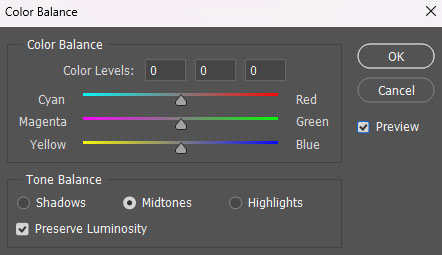
- You can even change the tones of the image in shadows, mid-tones, or highlights.
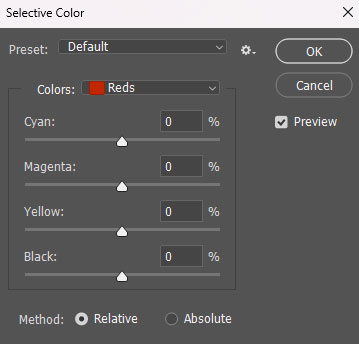
Now to make a selective color:

- Go to image>Adjustments>Selective Color. Then select the color from the drop-down menu. Also, you can adjust the color cast of your chosen color using the slider.
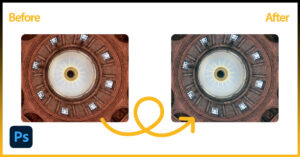
- Correcting Colors Using Levels And Curves
Levels and curves are one of the most advanced adjustment tools in Photoshop that will help you correct the exposure of any image. Think of it like you have an image that is either too dark or too bright overall.
With the Levels and Curves adjustments, you can easily tweak the tonal range of the image and bring out the details in the shadows or highlights. This will make your image look more balanced and properly exposed.
Though both tools are a bit tricky to operate, here are simple steps you can follow:
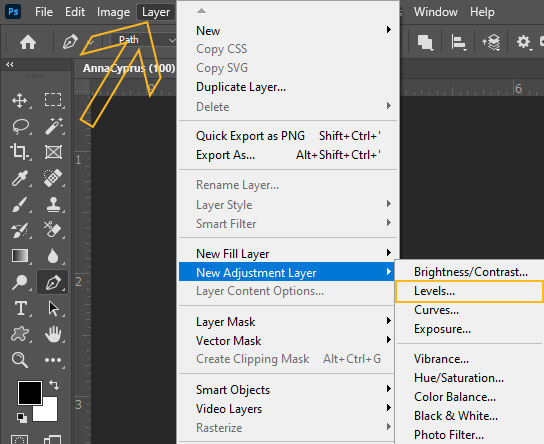
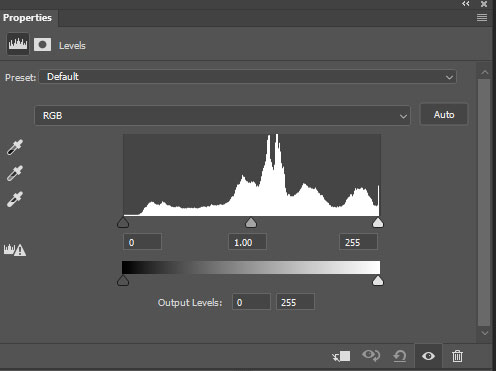
- Go to the layer from the top bar menu and create a New Levels adjustment layer. A histogram graph will appear in the property panel like in the image above.
- Now hold the slider and adjust the shadow of your image.
- If it is too dark, drag the slider to the left and if it is too light, drag the slider to the right.
Similar to the Curves,

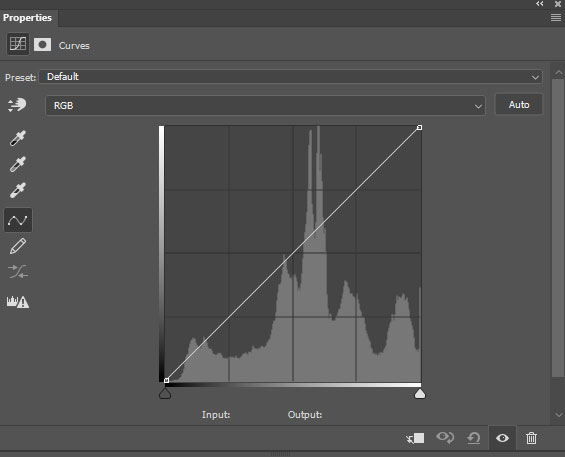
- create a Curves adjustment layer from the top Layer menu.
- A histogram graph will appear on the screen where you will find a curve.
- Hold the curve and adjust it to the lower-left and upper-right sides.
- Continue the adjustment until you are satisfied with the result.
- Retouching An Image To Remove Unwanted Spots Or Objects
Though you have a digital camera with high-quality sensors, it may accumulate dust particles. If so, it may show up as small spots or blemishes when you’re capturing your images.
That is when you need to remove these dust spots from your image to improve the overall image quality and appearance.
I like portrait photography but blemishes, acne, or other imperfections in the subject’s skin are quite common in this type of image. Photshohop retouching techniques make this task easier for me to remove unwanted blemishes and objects from an image subject.
Well, there are various tools in Photoshop to utilize in this instance. All you need to select any of the tools from the below, select the brush size, and drag it to the area that you want to fix:
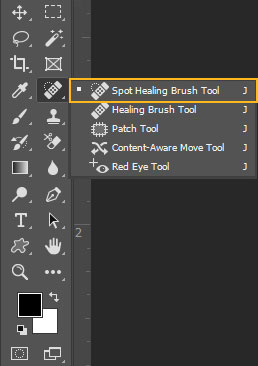
- Spot Healing Brush Tool: This is like the magical tool in Photoshop that will effectively remove unwanted spots, objects, or marks from your image.
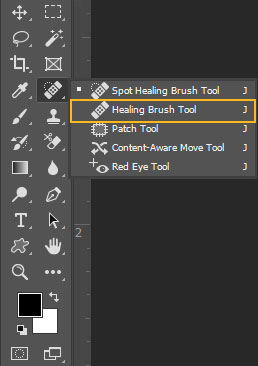
- Healing Brush Tool: This is almost similar to the Spot Healing Brush but works by sampling pixels and removing unwanted objects at similar pixels.
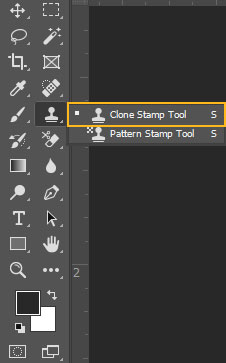
- Clone Stamp Tool: This is another great tool you can use to remove an intricate or unwanted object from your image and bring smoothness. This functions by copying pixels from one part of an image and painting them to another.
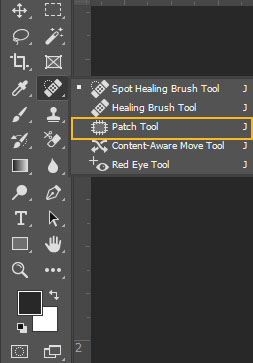
- Patch Tool: The patch tool proves effective if you want to erase any large distortion from the background of an image.
- Sharpening
As an image editor, one of the key tasks I often need to perform in Photoshop is sharpening images. Though it is a digital image, most often you may find it soft or blurry, which can be caused by factors like camera shake or improper focusing. This simply makes any image uneven and less crisp.
This is where I need to increase the sharpness of my image subject to make it look detailed and bring crispness.
However, follow the below quick tricks to sharpen your photos in Photoshop using the Sharpness tool.
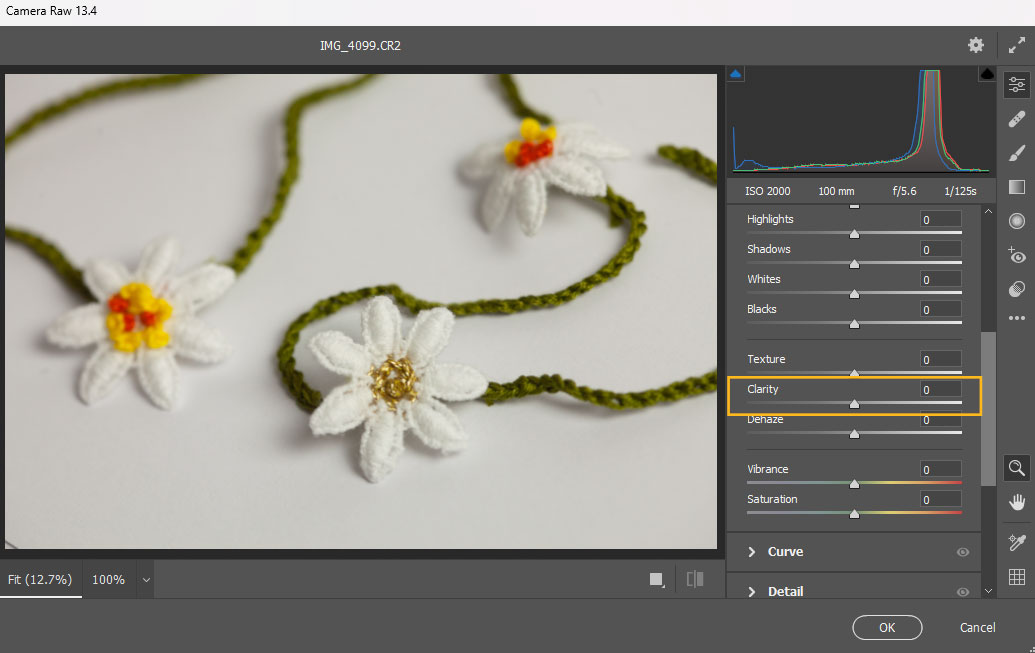
Step #1: Once your image is opened in the Photoshop workspace, open the camera raw filter from the Filter in the top menu bar.
Step #2: Now, use the Sharpening slider and make your image object more enhanced.
Step #3: If you don’t find the Sharpening tool there, go to Filter>Sharpen and choose any Sharpening tools to sharpen your photo. Preview your image before saving.
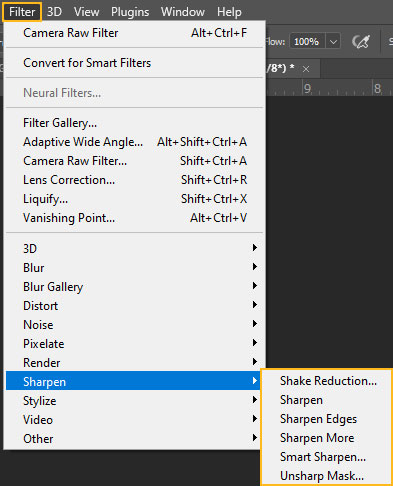
Step #4: Also, you can sharpen any image subject by noise reduction. For instance, go to Filter on the Menu Bar>>Noise>> and then select Reduce Noise

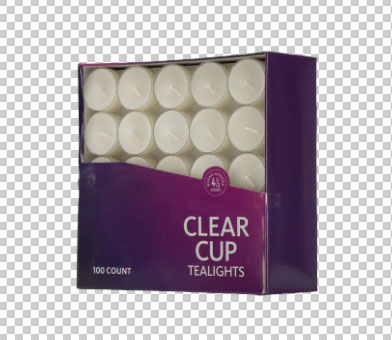
- Removing Background
If you have an e-commerce business or product photography, I can understand how important it is to present a clean product shot. That’s where you may need to remove the background from an image just to highlight the product against a clean, solid-colored background.
This process not only helps your product stand out but makes it easier to composite the image with any of the backgrounds you want.
Whatever the fact is, it is quite easier to handle the subject and the background of an image separately using Photoshop. Here is how can do it:
- Start by uploading the image from which you want to remove the background in the Photoshop workspace.
- Now go to the layer panel and create the duplicate layer.
- Go to the toolbar and select any of the selection tools to select the subject of your image.
- If needed, you can refine your selection as well with a refine brush tool.
- Then create a new layer with a layer mask and fill it with any solid color.
In case you want to cut off the subject of an image and replace it with a new background, it is even possible! Follow our effective guide on changing background in Photoshop and get precision on it.
- Creating Clipping Path
At times, you may need to handle an image background with so many complex shapes, intricate details, or transparent areas.
That’s where the clipping path comes into play. It mainly works by creating a closed vector path or an individual shape around the subject of the image and letting you cut it off through an isolation process.
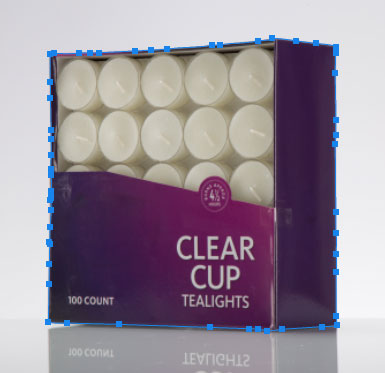
Beyond just removing the background, a clipping path is also helpful in manipulating an image in order to make it more enhanced.
Also, you can create a shadow of any subject with natural effects or restore any distorted image with so many bent or warped objects through it.
Anyway, to create a clipping path, you need to be precise in handling the pen tool. Have a quick glimpse at our comprehensive Photoshop clipping path guide to learn all the tips & tricks to master this essential skill.
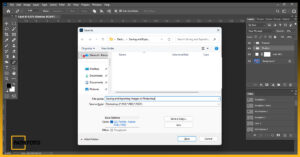
- Saving Your Photo
At last, you need to export your photo to your device and that’s also important to learn. Otherwise, all your efforts will just go in vain.

To save an image in Photoshop, File > Save As. A dialogue box will pop up on your window. Rename the file, choose a location of your device, and now choose a file format. Select JPEG 2000 or PNG as you want.
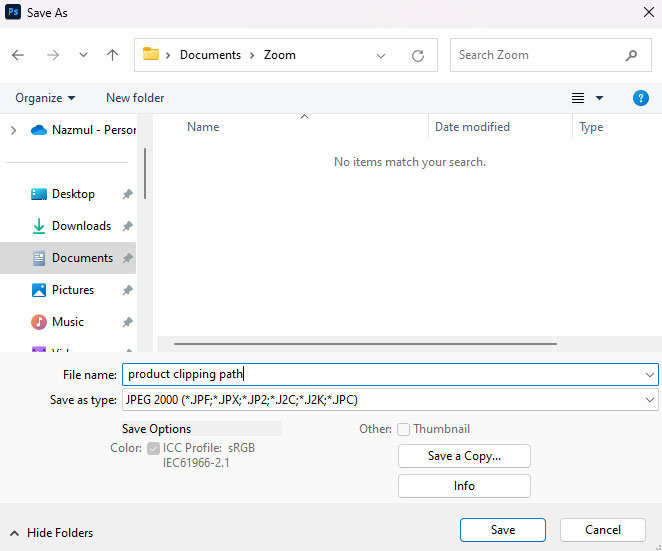
Finally, click Save and that’s all you’ve done.
How To Use Photoshop To Make An Image Editing Better?
If you are just new to this photo editing platform, certainly it would be a quite challenging task for you to handle complex images like those of cars. But don’t worry! Photoshop offers a ton of power, even for beginners as well. Follow our tips and tricks outlined above and make your tasks easy.
Also, you can use other photo editing tools like Lightroom or even take advantage of the premium photo editor online to get your job done best.
To get know more about it, we recommend having a short glimpse at our detailed guide on making any image editing better and being a pro in it.
A Quick Guide to Photoshop Photo Editing Effects To Add Styles
Photoshop is a wonderful tool not to just fix the issues of an image but to make it industry-stunning and look next level. For instance, you should get a better knowledge of various photo editing effects in Photoshop.
Though there are 1000+ effects available in the Photoshop editing industry, let me introduce some basic effects you can try out as a beginner:
1. Portrait Effects:
Adobe portrait effect is always favorable to the editor especially for making an image look more appealing and enhancing the subject’s features in a flattering way.
But while it makes the image look better, it’s important to apply these effects precisely as it can make the final result look unnaturally artificial or heavily manipulated.
For a quick guide, you can watch this effective tutorial:
2. Black & White Conversion Effect
This is the most basic effect you may need to apply to your image to give it an elegant vibe. Even black-and-white photography is one of the best options if you want to focus on any subject and texture of your image without distracting the color.
Anyway, to convert an image to black and white, here are simple steps to follow:
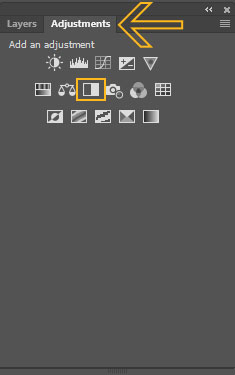
- With the image uploaded in the workspace, go to the Window > Adjustments.
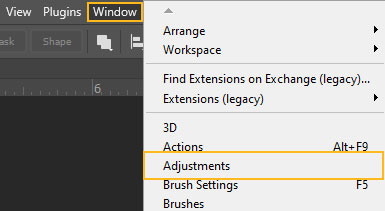
- Then click on the Black & White icon.
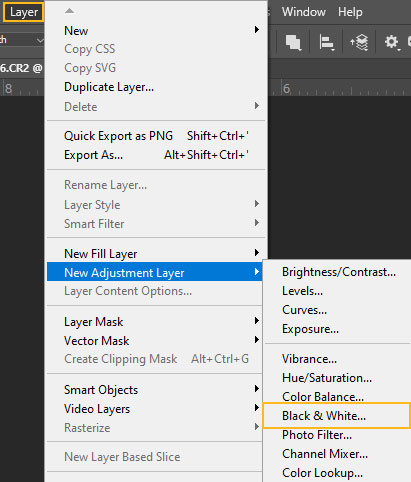
- Or you can do it by creating a black-and-white adjustment layer. For instance, go to Layer > New Adjustment Layer > Black & White. Rename your new Layer and click ok.
To add professionalism to your edit, you can check out this effective video:
3. Bokeh Effect
In portrait photography, the bokeh effect is one of the most popular effects to give blurry effects on the background and create a shallow depth of field in the image.
This design is enough to give your image a dramatic look. Here is an effective video you can watch to give a bokeh effect to your photos in Photoshop:
FAQs:
How do you adjust the white balance in Photoshop?
Adjusting the white balance is enough important to create a professional photo. The easiest way to correct the white balance of an image is to adjust the Color Balance. Go to Image on the top bar adjustment>color balance and adjust the mid-tones, highlights, and shadows slider as you prefer.
Is it possible to edit photos in Photoshop on mobile?
To use Photoshop in Mobile, Adobe Photoshop Express is the go-to software for you, equipping all the innovative features needed to edit a photo like a pro. Download this handy photo editing software from the Google Play Store or App Store for free on your Android, iPhone, or iPad.
What is the function of the dodge and burn tool in Photoshop?
The Dodge and Burn tools in Photoshop are quite effective in correcting the exposure of an image. The Dodge will change the exposure by brightening and the Burn tool works by darkening any specific part of an image.
In Closing
That’s all here about how to edit photos in Photoshop for beginners. Photoshop is like a go-to software not only for professional ones. Even a beginner can start what their very basic technique and convert any Photoshop to a mastering piece. All you need to be precise with whatever tool you will use from the toolbar in Photoshop.
For instance, today’s beginner-friendly guide should be enough for you to kickstart your Photoshop editing journey with confidence.
If you’re still unsure about any part, don’t hesitate to let us know your query by commenting. Our expert photo editor will be right there for your best assistance.