In today’s online or offline marketing landscape, I can understand how difficult it is to set up a brand identity especially when you want to highlight your product through images. Fret not! You can easily distinguish yourself from the competitors when you know all about the basics of retouching in Photoshop.
It includes a Spot Healing Brush or Clone Stamp to remove blemish, adjust the Levels or Curves for a natural look, or Lighten or darken the specific area of an image through dodge & burn.
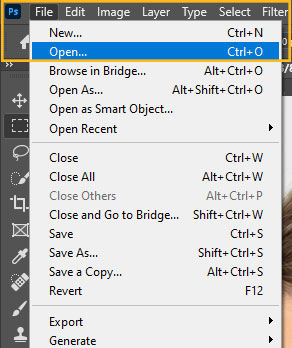
That’s not even end here! Photoshop offers several more retouching tools you can use to give your image a polished look.
Wondering how? Stick by me till the last!
What Is Photo Retouching & Why It Is Important?
Photo retouching is like giving your photos a makeover!
It involves using software to edit your images and make them look better. Through photo retouching, you can locate and fix the defects of an image which may include dirt, dust, blemishes, under-eye circles, saturation, etc. so that the final image looks glamorous
In short, photo retouching is the process of preparing the image for the final presentation. It is an important part of commercial photography, e-commerce photography, fashion photography, graphic design, and other fields that help to enhance the overall aesthetic appearance and professionalism.
Here are the details of what retouching work can do for the visual content of an image.
1. Enhance The Image
Photo retouching is the key driver of bringing the desired level of perfection in the image which photo editing can rarely bring.
You can get a deep level of processing through photo retouching which enhances the overall appeal of the image. Retouching completely transforms the image which in turn becomes visually aesthetic and pleasing.
2. Eliminate The Flaws
It’s true that images, whether the image is captured by a novice or pro, are not always flawless. For instance, retouching is the best solution to remove those imperfections.
You can get the image without flaws and distractions with slight touch-ups and that image takes the focus away.
3. Meets The Marketplace Standards
Many marketplaces have plenty of technical requirements that the merchants have to comply with. Such as sizing, background restrictions, file formats, and resolutions.
But in the post-production process of photo retouching, these technical requirements and the marketplace standards are effortlessly addressed. You can ensure the optimal presentation of your image on these platforms.
4. Bridge The Gap Between Online And Offline
That’s not the end here. One of the most notable benefits of photo retouching is that it mitigates the gap between online and offline retail. Through photo retouching, one eliminates the limitations of virtual shopping.
With the enhanced images of your product, the shoppers can examine the product closely and explore the intricate details of the product.
How To Retouch A Photo In Photoshop [Easy Tutorials!]
Do you want to make your image subject look its best? Photoshop is here for you with all its powerful tools to retouch and enhance a photo.
Follow my easy-to-understand, step-by-step guide till the end to explore all about retouching a photo in Photoshop:
- Isolating A Object
When it comes to retouching any image, isolation is the best trick to practice that provides a clear and distraction-free look at the object.
This is even an effective process for the e-commerce business owners which they use to retouch the product image.

This is how it works by removing or replacing the background of an image and making the object more focused and enhanced.
Now when it is about to remove an image background, there are several tools and features in Photoshop. But the isolation of images is a handy one where you can select the object, separate your image from the background, or use it in other design projects.
However, here is how you can isolate your image in a white background using a layer mask. I am going to use the Select & Mask Tool. Go as follows:
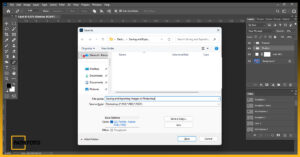
Step #1: With the image opened in Photoshop, create a duplicate layer.
Step #2: Now go to “Select” from the top menu bar and choose “Select & mask” from the drop-down menu.

Step #3: Go to the properties panel and select your view mode.

Step #4: Now select the Quick Selection Tool and drag on the object area of your image.

Step #5: You can use the brush refining tool to make a clear selection.

Step #6: When done, go to the layer panel where you will find a layer mask. Use the Eye button on the mask and isolate your image background.

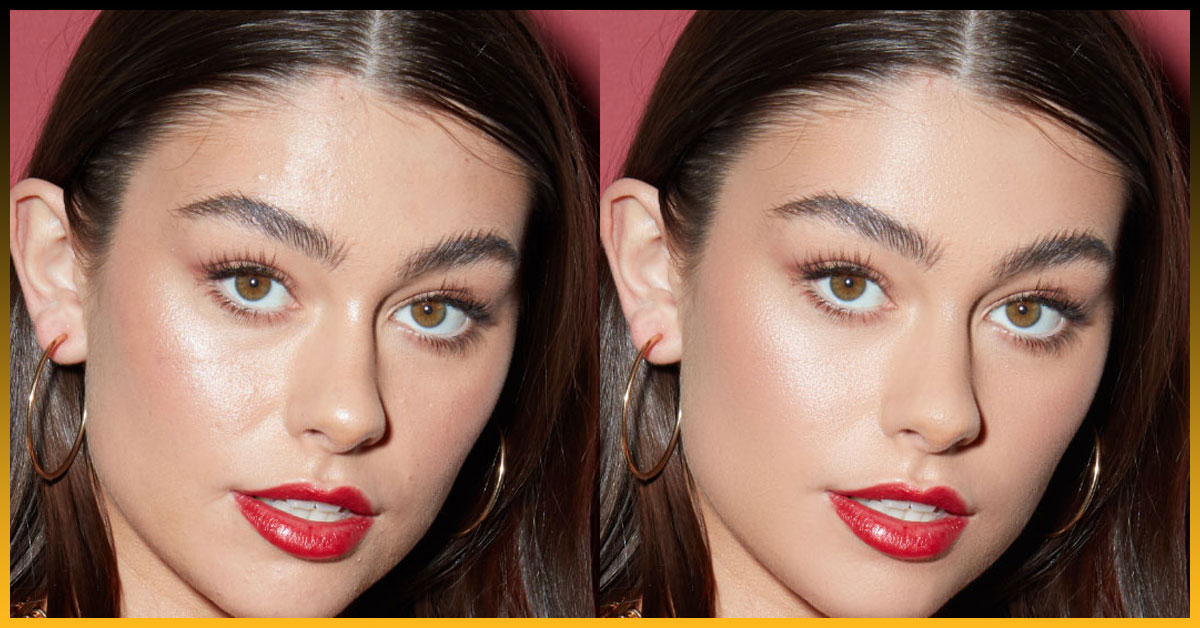
- Skin Retouch-Up Tools
As a photo editor, it’s not uncommon you may need to handle to retouch up the skin. That’s where Photoshop offers all the amazing tools and high-end skin retouching techniques to transform any model image into a professional one.
Whether you have blemishes, wrinkles, or unwanted marks on your model skin, Photoshop will bring the best solution there.
You can also minimize imperfections of the skin while maintaining a natural look.
However, let me introduce some of the effective skin retouching tools in Photoshop to enhance your image look:
Spot Healing Brush Tool:
There are a bunch of tools in Photoshop to fix the unwanted flaws of a picture. But spot healing brush is the most effective one you can use to remove unwanted spots, marks, or even small objects from the image.

It automatically samples the surrounding area and blends the pixels to seamlessly blend in and conceal your selected area.
As a photo editor, I mostly utilize this tool to remove dust spots and small distractions from my images.
Here is how you can use this tool:
Step #1: Start with uploading the image in your Photoshop workspace. Go to the Layers panel and create a new layer. You can rename it ‘Spot Healing’.

Step #2: Now zoom in on your image to highlight the blemish on the skin.

Step #3: Select the brush tool, move it over the spots, and erase them.
Step #4: You can even change the brush size from the Options bar and make it bigger or smaller.

Brush Tool:
This is the most basic tool in Photoshop similar to a real paintbrush that you can use to paint on any layer.
Generally, I use it to paint over blemishes, wrinkles, or unwanted marks. By sampling colors from nearby areas with smooth skin, I can blend out the imperfections of my image in a shorter time.
- With the image opened in my Photoshop workspace, select the brush tool from the toolbar. Or press the B key on your keyboard as the shortcut key.

- Now go to the Color Picker Tool and select the brush color you desire.

- You can even customize the brush settings like size, opacity, or hardness from the top menu bar options.
Content-Aware Tool
This is another great tool in Photoshop that you can use to erase unwanted objects or fill in missing parts in an image. It mainly works by analyzing pixels within the specific area and comparing them with other pixels of the image. Based on the comparison, it re-creates the selection using an algorithm.
Here is how I use this tool to remove any distracting piece of my image:
Step -1: Start by selecting the specific part of your image using any of the selections tool. You can use the Quick Selection Tool, Lasso tools, or Marquee tool.
Step -2: Once selected, go to Edit>Content aware fill to open this feature in the workspace.

Step -3: Now drag the tool over the area you want to sample and let it do its work.
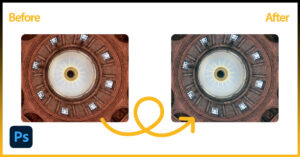
Frequency Separation:
If you want to smooth the skin texture in your model image without affecting the color or shadow, frequency selection tools in Photoshop would be a go-to suggestion for you.

It allows you to separate high-frequency information about your image from the other details. These may include hair, texture, pores, fine lines, or any other skin imperfections.
Here is how you can utilize the frequency separation tool in Photoshop to retouch your photo:
With the image opened in your Photoshop-
- Create two duplicate layers in the Layer panel. You can rename them as “Texture” or “Gaussian Blur”.

- Now disable the “Texture” layer and click on the “Gaussian Blur”.

- Then Go to Filter>Blur>Gaussian Blur and add blurriness to this layer. Select the radius level from 5 to 10px or according to your image resolution. Click OK.


- Now open the “Texture” layer. Go to the Image>Apply Image and from apply image window set layer to gaussian blur. You can set the Offset to 128 and Scale to 2. Also, change the blending mode to Subtract.


- Now from layer panel change the blending mode of Texture Layer normal to Linear Light. Then group these (Texture and Gaussian Blur) two layers by selecting both layers and holding the Shift on your keyboard. Drag them on the bottom of your Layers window.


- This time select the Lasso tool from tool bar and select the Gaussian Blur Layer and select the area of your image that you want to smooth. Continue retouching until you get your desired result.


3. Retouch A Photo With Basic Adjustments
Photoshop offers a bunch of adjustment tools to adjust the contrast, and brightness, curves, level of any image in order to make it more enhanced and fine-tuned.
Let me introduce each of these basic tools with how you can use them in your image:
Brightness/Contrast:
To retouch any image, the absolute adjustment of the brightness and contrast is the core fact you need to ensure.
In case your image is too dark and it seems difficult to see the skin details and imperfections you want to address, slightly increasing the brightness will help you there.
Beyond that, your image should have a good balance of light and shadow with clear skin details. For instance, adjusting brightness and contrast is a must!
Anyway, it is easier to play with the brightness of an image in Photoshop. All you need to:
- Create a duplicate layer in the layer panel.

- Go to Image> Adjustments> Lastly Brightness/Contrast.

- A dialogue box will open through which you can adjust the brightness or contrast from the slider.

Curves & Level Adjustment:
The curves and levels are great tools in Photoshop that allow you to adjust the color balance and tonal range of an image. It will give you more control over the light and shadow of your image.
By adjusting the sliders or curve line, you can customize the brightness and make a dark image brighter or a bright image darker.
See my image below and you can see the result on your own.

Read a thorough read on our effective Photoshop basic techniques guide and learn how to be pro this fundamental adjustment to retouch an image.
4. Exposure & Color Correction
When you want to give an image a more natural look by making it lighter or darker, exposure correction is the go-to solution for you.
Besides as the name suggests color correction will allow you to adjust and enhance the colors in an image to get the desired colored look. Both techniques are effective in eliminating any imperfections from the image and making it look tuned.
Well here are a few effective tools through which you can get control over the exposure and color balance of an image.
Adobe Camera Raw Filter:
This is the amazing filter that allows you to access the powerful features of Adobe Camera Raw (ACR) for non-destructive exposure and color correction within Photoshop.
It will help you to adjust an image that is incorrectly exposed. With the image opened, go to the Filter from the top menu and find the Camera Raw Filter from the drop-down menu. Click on it.

When done, click on basic option and choose Exposure.

Adjust the slider and get your photo perfectly exposed.

Hue/Saturation:
The Hue/Saturation adjustment in Photoshop is a versatile tool that you can use to manipulate the colors within your image.
Mostly I use Hue/Saturation to correct minor white balance issues. This would be like my image has a slight yellow cast, I can adjust the Hue slightly to get a more neutral white balance.

To work with it:
Go to Layer > New Adjustment Layer > Hue/Saturation. A New Layer dialog box will appear, adjust the Hue/Saturation slider and click OK.


Color Balance:
When you are retouching an image in Photoshop, certainly you would desire a well-balanced image with accurate colors to make it more natural and pleasing to the eye. Color casts can be distracting and make the image look unrealistic.
This effective adjustment will also allow you to correct color imperfections and provide a dramatic effect on the overall texture of your image. Here is how you will do it:
- Go to the Layer and click on the New Adjustment layer and select color balance.

- Go to the Color Balance and adjust the color slider as your own.

- Or, you can simply find the Color Balance icon in the adjustment panel. Click on it and adjust the color.


5. Blur & Sharpening
While retouching, sharpening can help you bring out the fine details and edges in an image, making it appear clearer and more defined.
Even it proves an effective process for me when my image has been softened due to camera movement, lens imperfections, or other factors. This allows me to restore all the lost details and crispness, improving the overall texture of your image.

In contrast, if you have an image with rough and hard objects, the blur tool can help you out there. Here is how you can access both of these tools:
Sharpen Tool: With the image open in Photoshop, go to Filter > Sharpen > Shake Reduction.

Adjust your image until you get the expected result. Here you will find many more options in the row to focus on the desired part of your image.

Also, you can use the Smart Sharpen filter or Unsharp Mask (USM) filter to get better control over the sharpening of your image.
To use the blur tool:
- Go to the layer panel and make a duplicate layer of your image.
- Select the blur tool from the toolbar.

- Now this is the time to set up the blur setting. For instance, you can change the brush size, brush tip, and modes from the workspace.

When done, simply drag the tool over the object or part you want to change and blur your image.
Note: If you want more blur, you can use the blur filter in Photoshop. Simply go to Filter > Blur and there you will find various options to blur any specific part of your image.

6. Dodge and Burn Tools
When you want to bring a three-dimensional feel to any image by adjusting the contour, depth, and shadows, Dodge and Burn tools in Photoshop are right there to start.
Photo editors mainly use these tools to lighten the underexposed area or darken the most lightened area of an image.

The best part it works in a non-destructive way means you are editing these parts without harming a single pixel of the image.
Now let’s have a short glimpse at how you can use this tool to retouch your photo:
Step #1: Simply start by creating two new layer in the layer panel and name as DODGE and BURN.

Step #2: Go to the toolbar and select the Dodge and Burn tool.

Step #3: Adjust the size, hardness, and opacity of the brush from the top options bar.

Step #4: Now drag the tool and paint over the areas you want to darken or lighten.

Step #5: Finally, fine-tune your result by adding layer masks you are done!

7. Clone Stamp Tool Photoshop
The Clone Stamp tool in Photoshop is a very useful tool for photo retouching. You can use it to remove unwanted objects, blemishes, or imperfections on the skin. This tool lets you manually copy a texture from one area of the image and stamp it onto another area.

Mostly I find the Healing Brush blurring my image, making it messy smudged edges. For instance, the Clone Stamp tool proves effective as it helps to work areas with defined edges.

You will find a particular Clone Stamp Tool in the toolbar. Simply select the tool and drag it to the area where you want to make a sample.
When done, adjust the brush setting from the menu top and paint over the area you want to retouch.

Best Photoshop Photo Retouching Services Online
In case you lack the skills to do advanced retouching in Photoshop, an online service can provide you with the expertise and tools you need. There are a good number of Photoshop retouching services online that allow you to fix and retouch any photo- no matter how distracted it is.
You just need to upload your photo and a team of skilled professionals will be right there to handle the editing tasks.
However, here is a comprehensive list of the best Photoshop photo retouching services online you can choose from
| Best Photo Retoucher Online | Key Features | Pricing Details |
| Path Foto | Best customer support Not a single touch of AI Dedicated project team 24-hour support Free trial available Unlimited revisions Urgent delivery option | Starts at $0.69 per image |
| Clipping Way | 24/ 7 availability Good customer support A team of professional editors Good quality Free trial available | Starts at $0.80 per image |
| Perfect Retouching | High-quality services Precise at product and jewelry editing Quick response 24/7 live support Free trial available | The price depends on the delivery time and the number of photos |
| Fix The Photo | Professional photo retouching services Guaranteed security Free trial available Doesn’t rely on AI technologies Pro photo restoration services | Price ranges from $1 to $6 an image. |
| ePhoto VN | Unlimited revisions No copyright Professional results within 24 hours Good customer service | Price ranges from $0.5 to $8 |
FAQs:
What are 2 ways to remove blemishes in Photoshop?
If you are struggling with the unwanted skin objects and blemishes of your model image, hit the Spot Healing brush to quickly remove them. Also, you can use the Clone Stamp tool to locate the large object, and erase it from your image.
How to make facial features stand out more in Photoshop?
With the image open in Photoshop, select the Dodge and Burn tools to lighten or darken specific areas of the image. Also, you can use the Liquify filter to change the area you want and subtle your facial retouching tasks.
How can I fix the red eye of my image in Photoshop? Source
Photoshop offers an effective tool to fix such distractions named Red Eye. Go to the toolbar and select the red eye Tool. Now simply click on the red eye area and it will automatically correct the imperfection of your image.
In Closing
Amidst various software avoidable for refining an image, I recommend Photoshop as the go-to software that helps me get detailed and professional-looking photo retouching results.
All you need to utilize the basics of retouching in Photoshop and in this instance, I bet our above discussion is enough for you.
Still, if you have any confusion regarding any fact discussed above, don’t hesitate to let us through comments. Our expert photo editor will be right there for your best assistance!