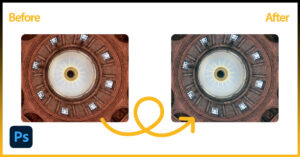
Are you struggling to make your product photos stand out online? The messy background of the image just pulls focus away from what you’re selling and affects your overall overall brand image. Though several solutions right there in this photo editing world, clipping path in Photoshop offers a precise and versatile approach to get a clean and professional look in the image that will definitely boost your sales.
Utilize this tool to create vectors around the subject of your image and make it isolated from the background with a layer mask. Then you can easily remove or replace the unwanted background with a new clean one.
However, as a beginner, handling this editing tool can seem a daunting task for you. Fret not! We’re here with this easy step-by-step tutorial that will help you master the clipping path tool even with no prior experience.
What Is A Clipping Path in Photoshop?
Clipping Path is one of the most powerful pen tools in Photoshop designed for selective adjustment of the specific part of an image. This would be like you can remove, cut out, or “clip” any image to bring precision.
Moreover, the technique is also used to cut out the unwanted background from an image or add a white background to it. The overall process is done by creating a close vector path using a pen tool and converting that path into a selection.
Beyond the pen tool, you can also create the path with the magic wand tool or other selection tool, but there will be a lack of precision and won’t produce accurate results.
However, by path structure, you can create a clipping path into any of these basic layers:
- Single Layer: This is the most basic using a single path to define the selection. The technique is mainly used to remove or change the image background.

- Multipath: This path is used to create a more complex selection, useful for objects with holes or overlapping elements of an image. Adding to this, you can use this path to create separate clipping paths for different sections of a clothing item or product and recolor certain areas subtly as you want.

- Illustrator Path: When you need to make more than one vector shape, you can create the clipping path in Adobe Illustrator and then transfer it to Photoshop for use
Importance Of Creating A Clipping Path While Photo Editing
Beyond any doubt, in the world of photo editing, precision is the king. Whether you want to showcase your products with a white background or to create composites, achieving clean separations between objects is a must. This is where the need for clipping paths of images comes in.
Let’s explore what are the practical uses for why you will need to clip the path of an image:
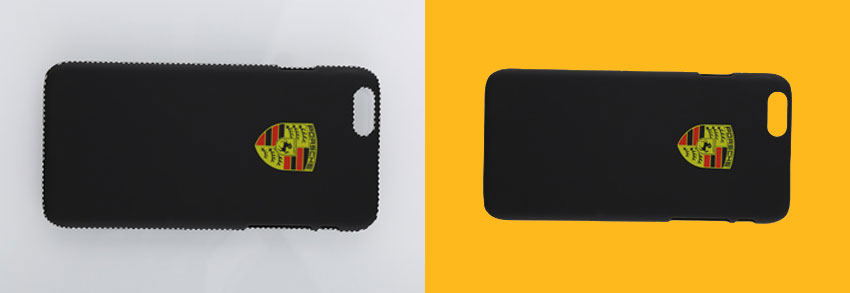
i) Background Removal:
The most necessary use of the clipping path is removing the background of an image. This is more crucial if you have an e-commerce business and need to show jewelry, furniture, books, or any other products online.
By creating a clipping path, you can quickly isolate the desired product and place it on a clean, consistent background.
ii) Image Manipulation:
The Photoshop clipping path allows for manipulating an image to bring a more furnished look to it. When isolation an image, you can select any specific area of your image and adjust it as you prefer without affecting the rest of the picture.
iii) Shadow Creation:
While there are many more functions in Photoshop to create shadow, nothing can bring a natural effect on it as clipping will do.
Clipping paths allow you to define the exact shape and placement of the shadow. It can even help you create customizable shadows, enhancing the image look from flat to fantastic.
iv) Image Retouching:
If you have a completely distorted image with so many bent or warped objects, a clipping path can still be a valuable tool in your restoration process. By creating clipping paths around each individual object, you can separate the damaged part and rebuild your image as you want.
v) Color Masking:
Taking shots on camera sometimes fails to bring the right color combination to the image. However, the clipping path can also help you to achieve the desired color and tonal adjustments in post-processing.
This is the most useful process for every eCommerce owner to enhance brand value to the traffic by providing a visually appealing product image.
VI) Invisible Ghost Mannequin:
In the world of photography, the invisible ghost mannequin is the most popular technique that is used to create an illusion of the garment worn by an invisible model. With a clipping path, creating a ghost mannequin is much easier now which precisely creates a path around the garments in both photos in Photoshop.
For instance, a clipping path draws a digital outline around the object with the pen tool and isolates it from the background, resulting in a quick separation between the garment and the mannequin.
How Do You Create A Clipping Path In Photoshop? [Easy Step-by-step Tutorial]
When it is about removing the background and isolating objects in your Photoshop projects with pixel-perfect precision, the only thing you need to take control on the pen tool.
Fret, it is not tough though. Follow these simple step-by-step guides, and I bet you’ll be a clipping path pro in no time. Let’s start!
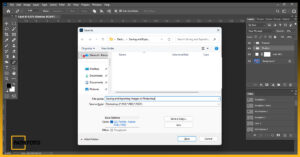
Step #1: Open The File
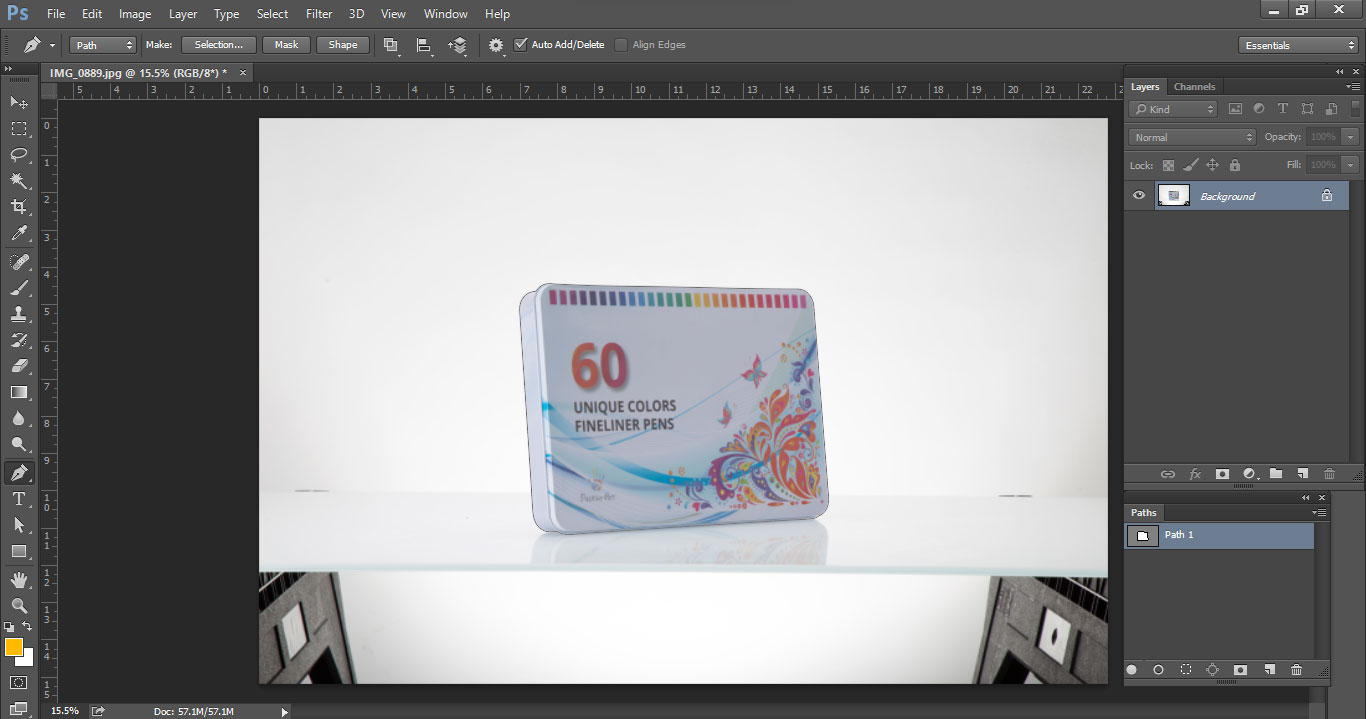
Now that you have opened your Photoshop, start by uploading your image in Photoshop. Simply click File and press Open or Ctrl+O to browse through your image and upload it from your device.

Step #2: Select the Pen Tool
In the next step, go to the left toolbar and select the Pen tool in the row. Besides press P to navigate the Pen tool automatically. Here you will see pen tools in different categories. Like:
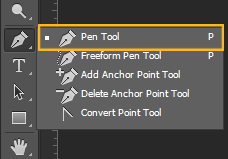
- Freeform Pen Tool: Helps to draw vector shapes and paths automatically by adding anchor points.
- Curvature Pen Tool: Designed to make creating smooth, curved paths easier with the need to control handles or remember keyboard shortcuts.
- Add Anchor Point Tool: Helps to get finer control over the shapes you create with the Pen Tool.
- Delete Vector Point Tool: You can use it to modify existing vector shapes and paths, not clipping paths directly.
- Convert Point Tool: Designed to fine-tune the paths created by the pen tool.
Though the function of these pen tools seems a bit tricky, practice can make you perfect here. Anyway, it is time to zoom your image right at the object you want to create the path. I think it’s quite easy for you. Press ctrl and + to zoom in on the object or you can do it with the Zoom tool in Photoshop.
Step #3: Start Selecting & Adjusting The New Path
Now that you have zoomed in on your desired object, it’s time to create a path around that object. You need to be quite precise in this step.
Start by selecting the Pen tool on the edge of the object to Clip it and then move ahead like this. Don’t release the mouse until you create your desired path.
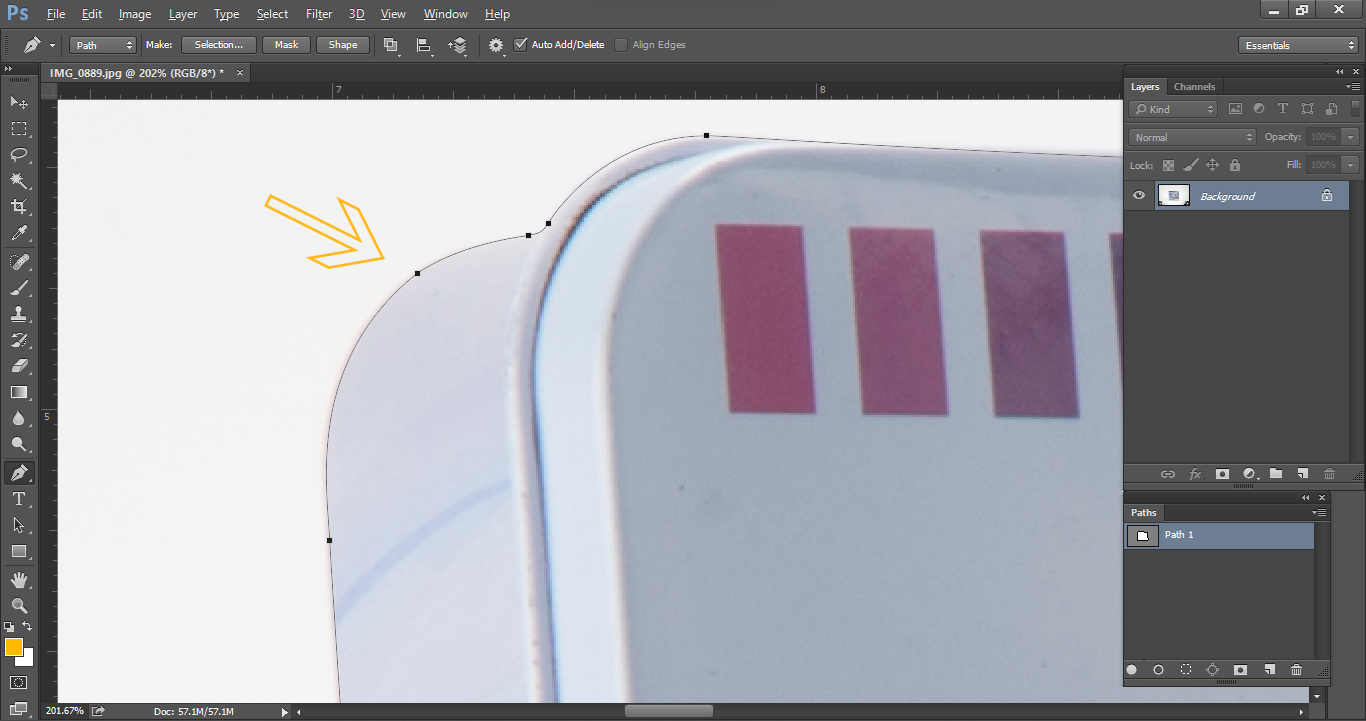
When it is time to create the curved path, click on the mouse while selecting the pen tool and pull it throughout your curved path and that’s all you have done to draw a path.
Release the mouse and complete the path in the same manner. When done, click on the first point and you will find a circle appearing right next to your Pen tool as in the image below. It is defining now you can close your path.
Step #4: Modify Your Path
Once you have got your path, you can even modify it with the Direct selection tool or the Path Selection tool. It’s also quite easy to perform.
i) Path Selection tool: Use the path selection tool to move, rotate, transform, or resize your path component.
- Find out the Pen selection tool from the toolbar and simply press A on your keyboard.
- Now click on the path that you want to modify. To select multiple paths, press Shift-click
- Here, you will find a running bounding box around your selected path with anchor points and handles.
- Simply drag the anchor points and handles and change the path shape to your preference.
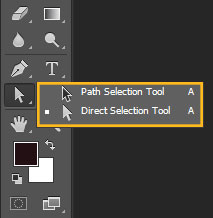
ii) Direct Selection Tool: Use the direct selection tool to select and manipulate individual or group anchor points or path segments with pinpoint accuracy.
- Select the direct selection tool or press the “A” key on your keyboard to directly switch it.
- Select an anchor point on your path and hold the Shift key to select simultaneously.
- Now drag selected anchor points or segments to the horizontal or vertical direction. By doing so you can even change the curve’s amplitude or direction.
Step #5: Save The Path

Once you are satisfied with your created path, now save it. To do so,
- Go to the Path Panel in Photoshop.
- Or you can simply navigate it by Windows > Paths. Now click on the Work Path for the path you have just selected.
- Finally, go to the taskbar and Save the path.
Step #6: Create a Clipping Path Around the Subject
Now this is the time to create a clipping path. For instance, click on the saved path you have just created on your path panel. Then go to the Panel menu and choose Clipping Path.
Step #7: Make A Selection From The Clipping Path
Several times you have to add or remove a background from an image in Photoshop. Once you have created a clipping path, the task is far easier now. Go to the Panel’s menu and select “Make Selection.” or you can use the shortcut ‘ Ctrl + Enter’.
To add smoothness, go to select from the above menu from your windows and then press Modify > Feather.
A dialogue box will appear on the screen from where select it to 0.5 to enhance the edge’s smoothness. A path would be selected around the Object.

Step #8: Create A Clipping Mask
In the next step, you will have to create a clipping mask and adjust the layer setting to add or change the image background. For instance, go to your Layers panel containing the image that you need to edit.
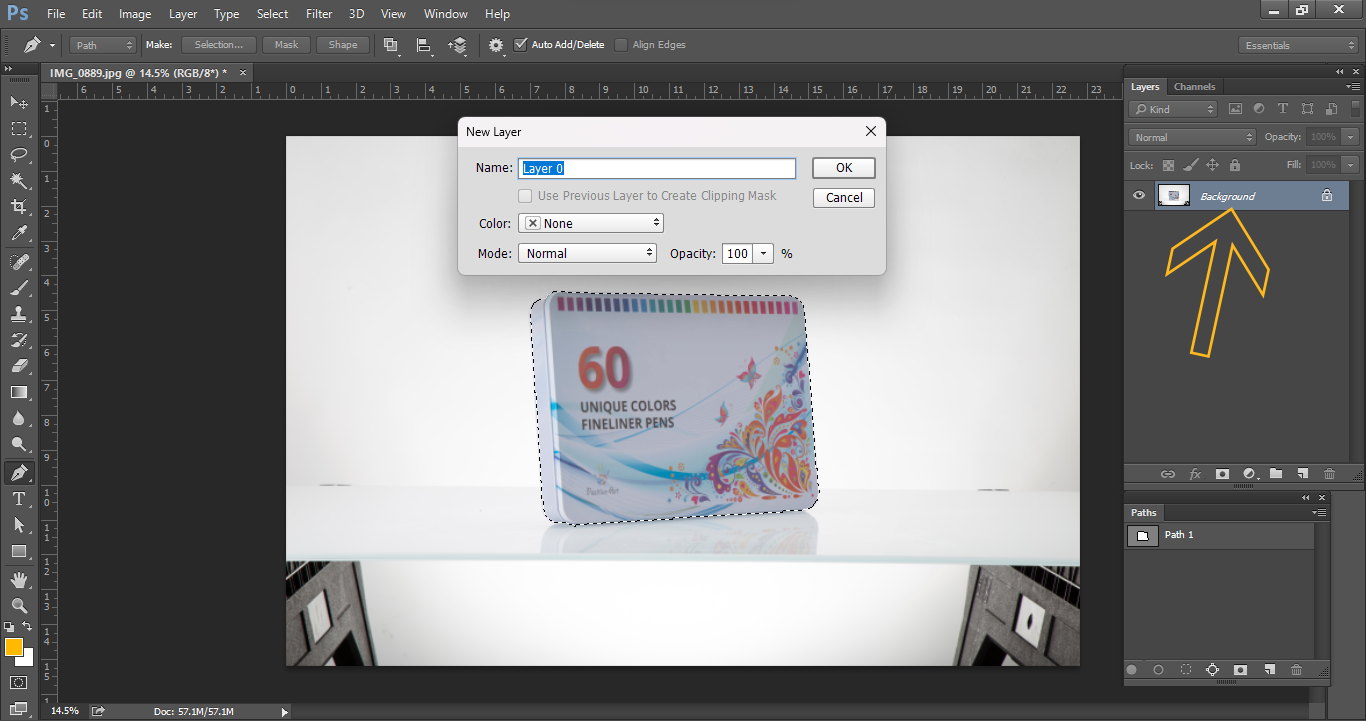
Make sure your product image is unlocked there. If locked, double-click on it and set the Layer 0. Click Ok.
Now click on the Add Layer Mask icon to create a layer mask on the panel. This will help you isolate your image from its background.
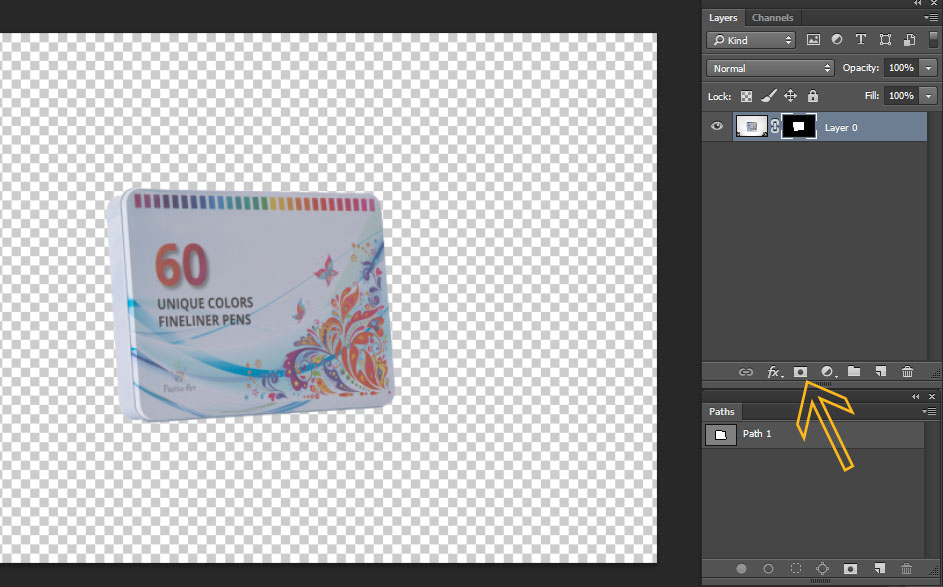
Once done, go to the solid color option and select any of your favorite colors to set as a background. Or you can simply remove the background as well. After all, don’t forget to save your image on your device.

Creating Clipping Path in Photoshop with Magic Wand Tool
The Magic Wand Tool in Photoshop is another handy selection tool, used for images with simpler edges or changing backgrounds with clear contrast. The wand tool can quickly select areas of similar color or tone within an image. Here is how you can use it:
Step #1: Start by uploading your image in Photoshop. Go to File>Open and browse your image or use short ctrl+0 to upload an image.
Step #2: Now go to the toolbox and select the Magic Wand tool from the menu.

Step #3: Now click on the parts of the image that you want to isolate or remove from the background. Adjust the tolerance level.
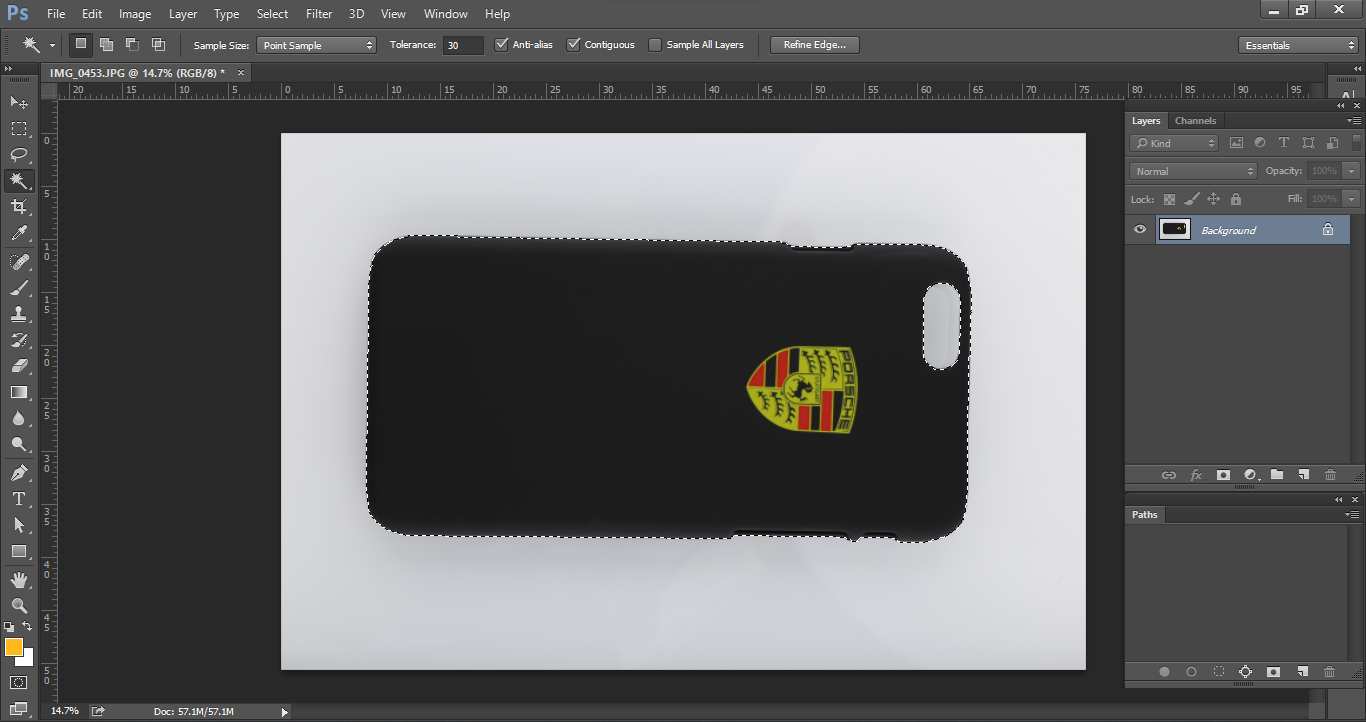
Step #4: To select an additional area, you can simply use the Shift key. Or, right-click and select Similar or Group to make a selection quickly.
Step #5: At this stage, you can refine the edges through Select > Refine Edge and adjust the Smooth and Feather. Do as your preface and click OK.

Step #6: Go to the Layer panel and click on the Add Layer Mask icon to create a layer mask. Your image subject should be isolated now. Finally, change your background color using the solid color tool.

Create Automatic Clipping Path by Quick Selection Tool
The quick selection tool in Photoshop is another amazing editing tool that you can use to select or isolate one or more particular smart parts of an image and fine-tune that as your own. Though several tools in Photoshop roughly do the same task, the Quick Selection Tool offers a unique blend of speed and control.
Mainly it is ideal to use when you want to make the first selection where accuracy is not that important.
Anyway, to use the quick selection tool, here are simple steps to follow:
- As before, upload your image in Photoshop from the File option or press ctril+0.
- Then go to the left-hand side Tools bar and select the Quick Selection tool. The shortcut key is Q on the keyboard.

- Now, drag the Quick Selection brush over the subject of the image that you want to isolate. You can increase or decrease the brush size as needed.
- Right-click and select “Make Work Path” and adjust the tolerance level.
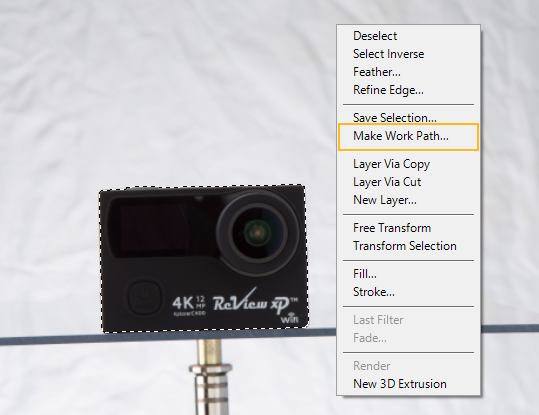
- After that, go to the layer panel, create a mask, and isolate that subject.
Pro Tips To Create Precise Clipping Path in Photoshop
The clipping path is like a gateway to achieving clean object isolation and professional-looking edits in Photoshop. But all is possible when you are being pro at these editing techniques. Here are some pro tips you can try to enhance your clipping path editing skill:
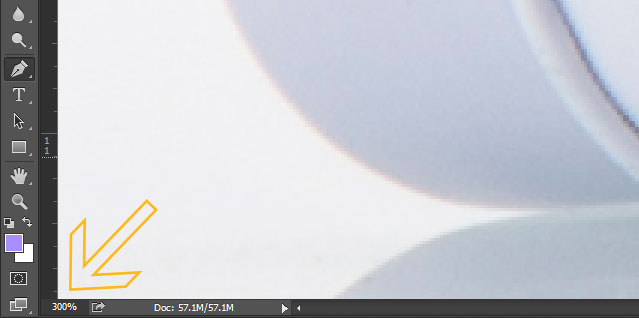
i) Zoom In for Precision: Before starting, make sure to zoom in on your image up to 300% to precisely notice the complex objects or objects with intricate edges. This will ensure your path is following every curve and detail.
ii) Don’t Overdo the Points: While creating anchor points, ensure you are not overdoing it. This would be nothing but make your path look jagged. Instead, try to make a good balance to capture the shape accurately.

iii) Be cautious about the curves: While the pen tool is enough to capture each edge on an object, you need to be careful while doing the curves. Use the Convert Point Tool further to refine your curves and make them natural looking.
iv) Utilize Direct Selection Tool: This is like the weapon to bring precision in the path adjustment. Use it to select and move individual anchor points or tweak the handles to fine-tune the curve.
v) Save Your Paths: Once you’ve created a complex path, make sure you are saving it. Otherwise, it will be a complete loss of your time and efforts.
Learning Shortcuts To Perform Clipping Path in Photoshop
While Photoshop doesn’t have a single shortcut to create the entire path at once, in this instance, you can follow the below shortcuts to speed up your workflow:
| Keyboard Shortcuts | Purpose |
| Ctrl + O | To quickly open an image in the Photoshop |
| P | Press P and select the pen tool automatically |
| H | Press H to select the handle |
| A | Press A and select the Direct Selection tool to adjust the path |
| Control + | It will help you to zoom in the image for precise placement of anchor points. |
| Control – | Zooms out to see the bigger picture while working on your path. |
| Shift + Ctrl/Command + N | Press this command to create a new layer automatically |
| Q | Press Q to quickly toggle the mask mode to visualize your selection while creating the path. |
| F7 | It is a handy shortcut to toggle the layers panel in Photoshop or to remove it from the screen to free up some space. |
| Alt+Click | Creates a clipping mask between two layers in the Layers Panel. |
| Shift + F6 (Photoshop CC) | To get smooth edges for the selection |

What To Do When Clipping Path Not Working In Photoshop [Learn Easy Solutions]
While making a clipping path in Photoshop using the pen tool, it’s not uncommon for you may face several issues starting from selecting an object or making a path clipped.
Whatever the fact is, here are a few troubleshooting steps you can try out to deal with clipping path issues:
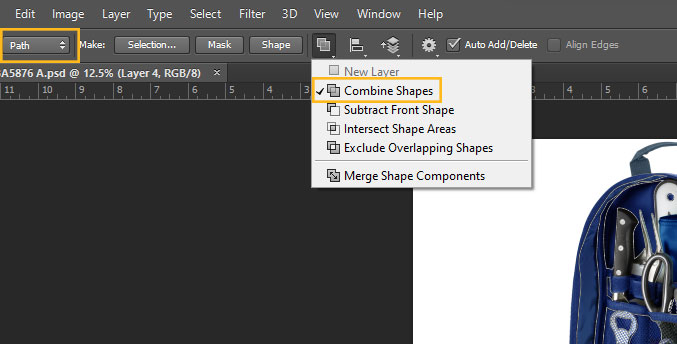
1. Path is Not Creating: If the pen tool is ignoring the path, go to the sub Path Items Path Operation settings on the top of the menu and check whether the Combine Settings option is checked.
2. Clipping Path isn’t Activating: If you are in trouble activating the clipping path, try it out from the first. Select the Pen tool from the left toolbar and then choose “Save Path.” Then locate and select the “Clipping Path” from the drop-down menu.
3. Path Options are not Working: If you can’t access the path options, check the Performance settings of your Photoshop. Click the Graphics Processor Setting and see whether ‘Use Graphics Processor’ is checked.
If the option is greyed out, then the best possibility is the GPU is not supporting your Photoshop. You need to switch to a modern PC with a higher GPU setting.

4. Rough or Jagged Edges in the path: At times you may find the edges you have just cut out are not as smooth as you want, It is even common when zooming in or printing the image. Use the refine edge or refine mask options to deal with the issue. You can smooth the hard edges by using anti-aliasing, feathering or the Blur tool.
5. Removing unwanted backgrounds: If it seems challenging to remove the unwanted background or elements from an image, use the background eraser tool to remove the unwanted part.
Or, you can use the clone stamp tool to effectively copy and blend any part.
6. Clipping path with hard corners: Creating a clipping path with complex shapes and edges can be sometimes troublesome. However, use the Refine Edge or the Select and Mask feature in this instance. It will give you multiple controls on refining the edges of a selection.
Clipping Path Vs Masking – Key Differences
The clipping path and image masking are the most common terms used in the photo editing industry. Though these terms reflect the same meaning, there are notable differences between them.

The clipping path is what produces the more accurate and sharper look of an image by working on sharp edges. But when it is with complex product images, fashion photography, or any scenario where precise selection and separation of elements are crucial, you will need to use a image masking.

It ensures the best control over different layers of an image like selecting the blurry edges hair strands, or other intricate details. Though it is not a precise cutting sharp edge, but can accurately select and isolate these soft edges with intricate details through masking, which is not possible with a clipping path.
Now coming to the applying technique, the clipping pattern is created by using the pen tool whereas the image masking technique uses a background eraser tool or color separation for background removal.
Clipping Path In Photoshop Online [Get Top Providers!]
Creating clipping paths manually can sometimes be a time-consuming and tedious process, especially when you’re with a complex image. For instance, you can pick online clipping path services with skilled professionals who will help you in both saving time and effort.
However, here are a few top-class clipping path services you can choose from online for your complex task:
| Clipping Path Service Online | Best Features | Pricing |
| Path Foto | 24-hour support Delivers 2500-3500 clipping paths work within 6-96 hours Unlimited revisions Not a single touch of AI Completely hand-drawn projects | Starts at $0.29/image |
| pixelz | Free trial Quick file upload 24/7 availability Unlimited revisions | Starts at $0.45/image |
| The kow company | 250+ certified professionals Faster delivery Lower cost | Starting at $0.35 to $0.39 for simple images |
| ymage | Quick file upload Cost effective Free trial ever | $0.35/image |
| Path Edits | 200+ professionals Quick delivery Successful projects24/7 support | $0.39 /image. |
FAQs:
When to use a clipping path in Photoshop?
A clipping path is an essential tool when you want to isolate a subject from its background, remove unwanted elements, or composite multiple images together. It is also great for photo retouching or changing the background color.
How to delete a clipping path in Photoshop?
In order to delete any specific clipping path, go to the Layer panel and right-click the clipping path layer. Choose Delete Clipping Path” and click on it. The saved clipping path will be deleted.
Why is my clipping path in Photoshop inverted?
Several factors are reasonable for this issue. Either the clipping path isn’t created incorrectly or you may set your pen tool to subtract. To fix this issue, go to the Paths Option Bar and select the Combine Shapes after creating a path.
Are clipping paths non-destructive?
Yes, the Clipping path is a non-destructive image editing process that can adjust any specific part of an image without permanently altering the original image data. It uses vector paths and works with layers to create a flexible layer mask that is changeable.
Are there any limitations to using a clipping path for retouching a photo?
Yes, the clipping path is a tool that is not suitable for a complex image with so many distortions and soft edges. For instance, if you create a path, it might not capture the natural flow and detail. Consider alternative tools or techniques like clipping masks to handle this task.
In Closing!
The clipping path in Photoshop is the most powerful and versatile tool that completely changes the way you approach product photography and image editing.
Starting from removing the background, restoring images, or changing color, a precision cut out and isolating an object from the background is needed. The clipping path makes this task easier for you. With skills through our easy step-by-step tutorial, hope now you are also a pro at it.
So, there is no chance of blurry product photos with distracting backgrounds. Open Photoshop, take this clipping path tool, utilize it, and showcase your products in the best possible light, bossing your brand image!