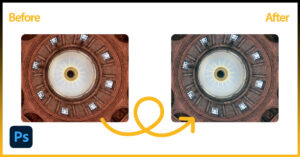
Changing the background of an image is a fundamental skill for any digital artist, photographer, or graphic designer. Whether you want to enhance your photo or create a composite image, you need to have a skilled hand in background replacement.
But as a beginner like you, first, I was also stuck on “How I Change Background In Photoshop”. After years of experience, now I am finding the fact super easy peasy.
After opening the image in your Photoshop, select the subject using any selection tools like the Quick Selection or Pen tool, now create a layer mask, and place your desired background behind, that’s all!
But I know previewing just these few lines won’t be enough for you. That’s why we’re here with a complete tutorial to make you pro on changing background Photoshop. Let’s move on!
How To Change Background In Photoshop? [Easy Step-by-step Tutorials!]
Whether you want to create a clean product shot or give a new life to an old photo, you need to be quite precise in handling the subject and background of the image.
The process might seem a bit much harder when you have an image with complex subjects that have intricate edges or similar colors to the existing background.
But fret not! Here I will guide you through the simplest step-by-step process to change backgrounds in Photoshop, even for challenging cases.
Step #1: Upload Your Image
All you need to do is first upload your photo in Photoshop. For instance, open your Photoshop, go to File>Open, and choose your desired photo in which you want to check the background.

As a shortcut key in Photoshop, press ctrl + O and upload the file directly. Also, to open the photo from the recently used menu, go to File>Open Recent and then select your image file. The image will be visible on the middle surface of your Photoshop.
Step #2: Create New Layers
When you are done with uploading your image, you will have to create a new layer to change the background of your image. It is simple to do that. Right-click on the appeared layer and press the Ctrl or Cmd + J to create the duplicate layer.
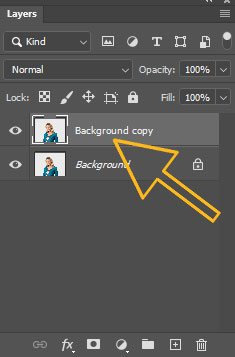
When done, click on the eye icon on your original layer and turn it off.
Now you will need to fill the new layer with a solid background color.
To do so,

- Go to your Layer panel and click on the Create New Fill or Adjustment Layer icon.
- Click OK and now choose the Solid color from the appeared options.
- Finally, pick any of your desired color from the color options or you can simply keep it White in case you are not sure about the background color.
Step #3: Select Your Object With the Quick Selection Tool
In this step, you will have to select your image object in order to separate it from the background. For instance, there are several tools in the Photoshop toolbar menu. Let’s start with the Quick Selection Tool.
Go to the left toolbar menu in your Photoshop, select the Quick Selection Tool, and drop it on the object of your image.
There are many other options to select an object:
- Object Selection Tool
- Magic Wand Tool
- Lasso tools
Anyway, choose any of the tools and click on the Select Subject option from the top bar menu above your image.

In case your image is not clear, you will find a dialogue box appearing on the screen, telling you that Photoshop is in trouble to find the subject.
This is the issue you can resolve by refining the edges of your image.
Move to the next step:
Step #4: Refine Your Selection For New Background
After automatically selecting your object, if you zoom your image, you will find the edges of your selection are not as accurate as you want.
For instance, you will have to refine your selection for more accuracy. Here are a few steps you can follow:
1. Fine-tune with the Select and Mask

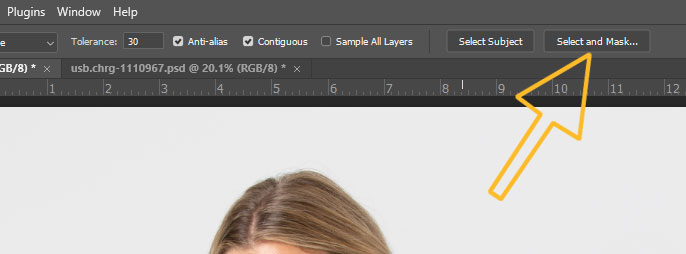
Start by selecting your Quick Selection tool and now click on the Select and Mask option from the top bar menu. By doing so, a new window will appear from where you can refine your edges.
2. Refine With Refine Edge Brush
From the window select the Refine Edge Brush Tool from the left side menu bar and blend the edges with the background.
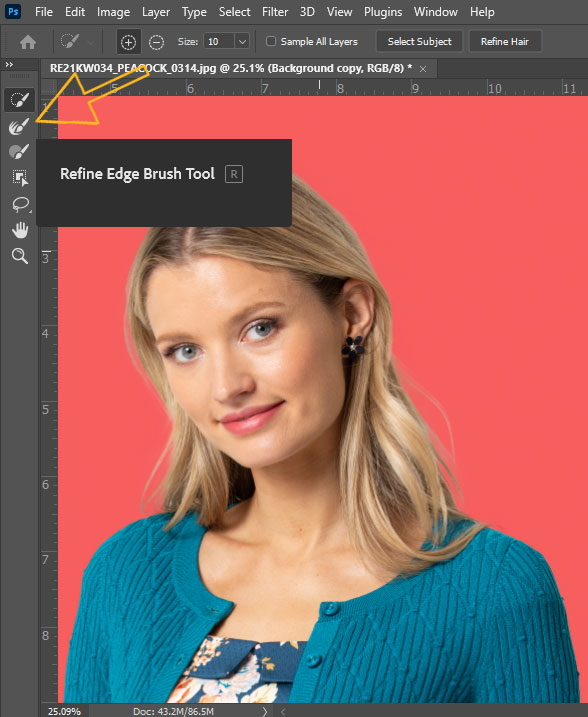
you can adjust the opacity and fine-tune your selection. To do so, choose white or Overlay options from the right side options of your screen.

You can adjust the Radius, Smooth, Feather, and Contrast through the sliders and get the perfect edges set up between your photo and image subject.
Once you’re satisfied with your work, switch the view to Black and White to see the outline better. When done save changes and click OK.
Step #5: Create a New Layer with Layer Mask
After refining the edges, this is the step when you will have to isolate your object in order to remove it from the background. For instance, simply you will need to create a layer mask and get your job done.
Go to the layers panel and select the layer mask from the bottom right menu bar. This will help you to isolate your object from the background.
Press Ctrl + j and select the Duplicate Layer from the layer option. Then turn off the eyes icon from the other layers.
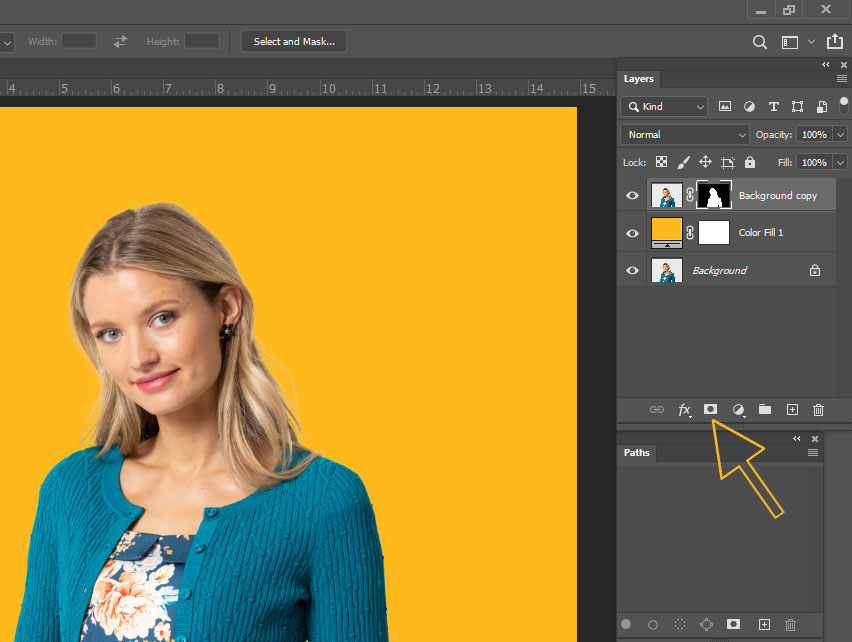
Step #6: Fill Your Background With a Solid Color
Now when you have a new mask on the layer panel, make a solid fill for it to change the background color. Go to the layer panel and click on Adjustment Layer.
Now again select Solid Color from the listed options and change your background color. Congratulations, you have done it!

Step #7: Change Your Background
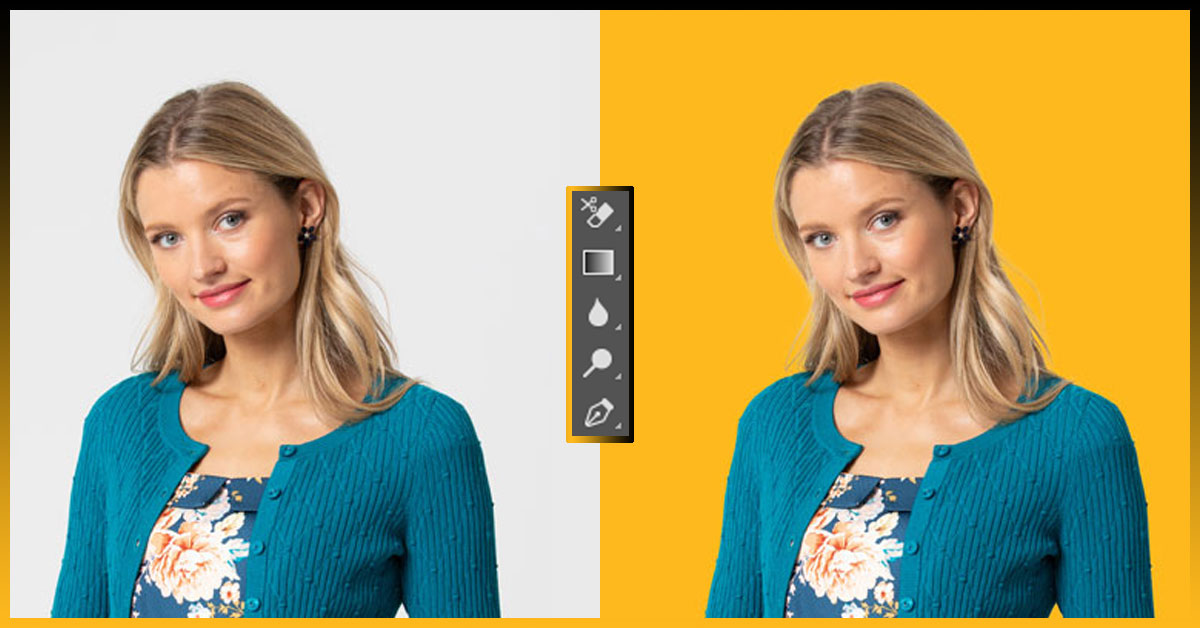
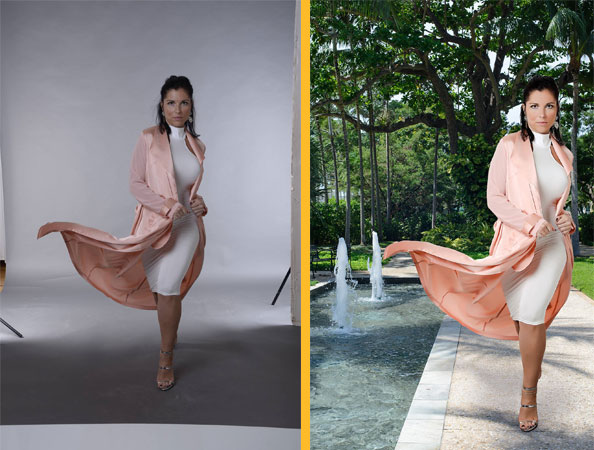
In case you want to cut off the subject from the existing image and place it in a new background, it is also simplest to do so. You just need to import the image with your desired background directly.
Now go to the layer panel and drag the new background layer behind the subject. Then use the Refine Edge Brush tool to effectively blend the subject with the new background
Step #8: Set Up Your New Background
Up to now, it looks quite pretty. But you can make it better through a few changes in your image.

For instance:
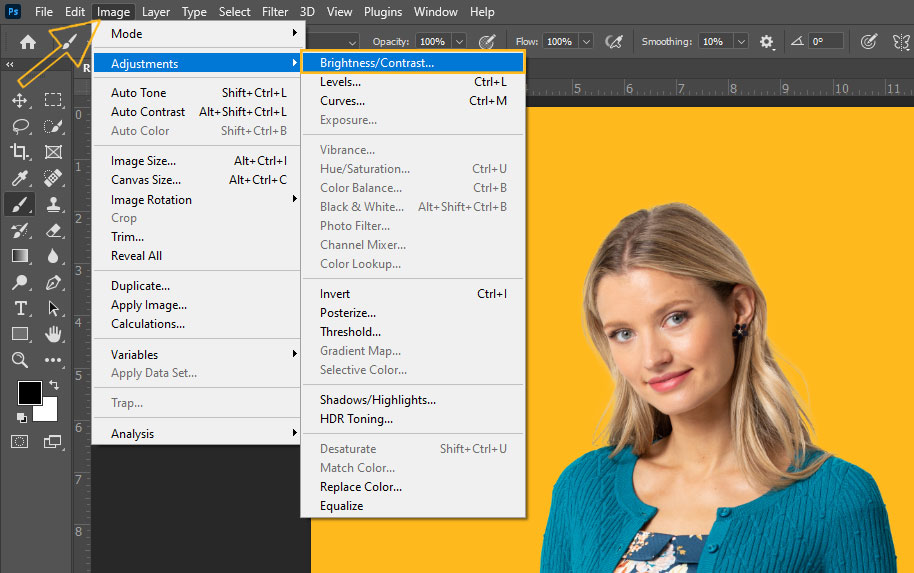
- Adjust Brightness: You can adjust brightness to blend your subject with the background properly. To do so, go to the “Image” menu and then select “Adjustments” > “Brightness/Contrast.” use the slider and adjust brightness.
- Match The Color: You can also fix the color to make it more fine-tuned. Just Go to Image > Adjustments and then Match Color. A window will pop up.
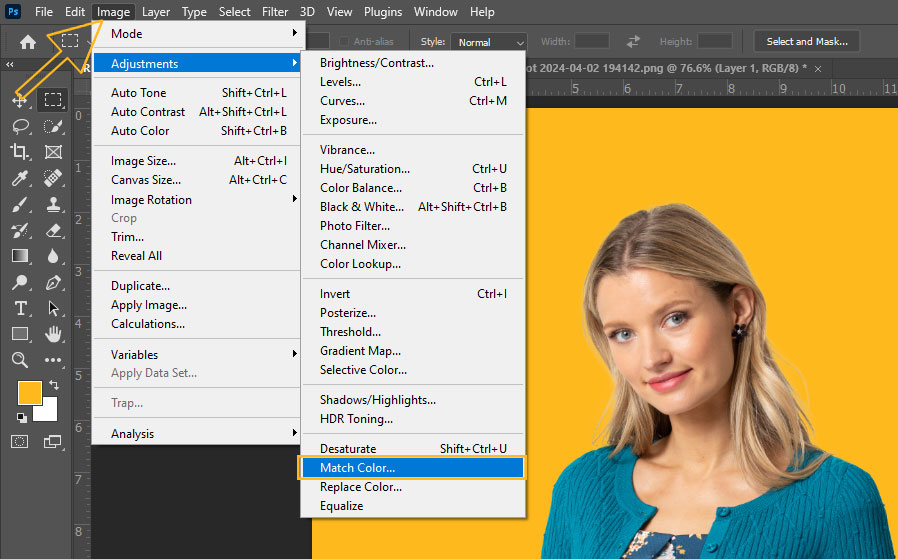
Go to Source and select the layer of your image that you want to fix. Now accordingly adjust the Luminance, Intensity, or Fade as you want.
- Match the light source: Another thing I will recommend is to ensure the lighting source of your background is pointing in the same direction in your foreground image.
If not, press Ctrl T (Windows) or Command T (macOS) and transform the layer.
Then right-click and flit the background image horizontally from the Flip Horizontal option in the dropdown menu.
- Match The Depth of Field: This is the major factor you can apply to get a resist background in Photoshop. Select your new background layer. Go Filter>>Blur Gallery>>Tilt-shift to make your subject more focused in a bit blurry background.
Step #9: Using Digital Background In Photoshop
Do you have an image with a digital background and you want to place your subject to that background? Fret not, the process is quite easy with Photoshop.
The overall process is almost similar to that we have already discussed above. Here are some additional factors you can consider:
- Start with selecting the subject of your image, use the quick selection tool, and Select and Mask option to create a mask in the layer panel.
- Then refine your edges with the refine edge brush tool.
- Now upload your image with a digital background and make sure it is proportional to the subject. If required adjust the size by pressing ctrl + T.
- After placing the subject over the digital background, you will need to match the light source by adjusting opacity, overlay, and texture.
- Also, pay attention to positioning your subject realistically within the background.
- To add more realism, I often try to add a subtle shadow beneath the subject to ground it in the background
Step #10: Save Your Image
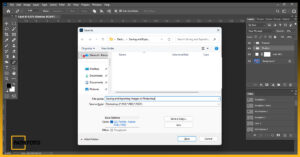
Now that all you have done, save your file. Go to File > Save As and save your image on your device.

Before that, you can save your file in the PSD (Photoshop Document) file format to save all your edits. It will also work as a backup saved in your Photoshop to use in the future.
Alternative Methods To Change Background In Photoshop
As a professional photo editor, you don’t just need to stick with one process to change the background of an image in Photoshop. There are a few different ways you can use to achieve the same result.
Here you go with some of the effective processes that I always follow:
1. Photoshop Remove Background tool
This would be a go-on process to change the background of your image in Photoshop if you are not concerned about the fine-tuned edges on a specific subject. Anyway, to use the remove background tool in Photoshop (available up to the newest versions):
- Open your image in Photoshop.
- Go to the Layer panel on your right-hand side and press CTRL + J for Windows or Command + J for Mac. It will create a duplicate layer.
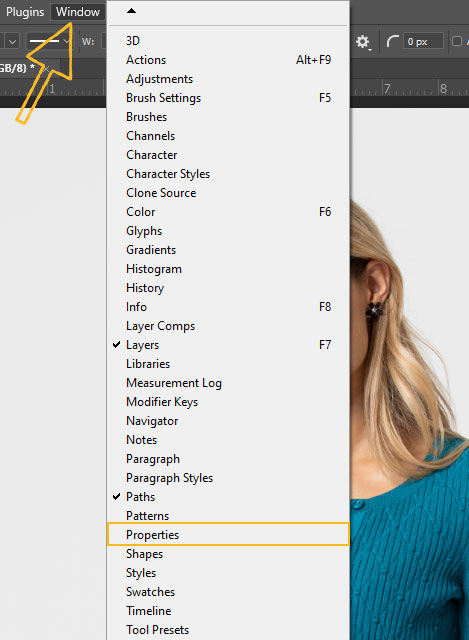
- Now go to the Properties panel and click Remove Background from the quick actions menu. (If you don’t see the Properties panel here, don’t worry! Go to Window from the top menu bar and select Properties from there. )

- Then go to Select from the top menu bar and slick Select and Mask. Select the view to Overlay (V)
- After that, select the brush tool and erase the remaining background from your image. You can refine your edges now what the options Smooth, Contrast, and Shift Edge in the Properties tab.
- Select Output from the same tab make your selection as a Layer Mask and click ok. Save your image.
2. The Background Eraser tool
The background erase tool is another effective tool that you can use to remove the background from an image.
You can use the tool on your image’s background with multiple color and you want to erase your background without the hassle of any selection or layer masks.
It works by recording the color/hue value of the pixels right in the center of the brush and selecting any pixels in the image that have the same value when you start brushing.
However, here is how you can use this tool:
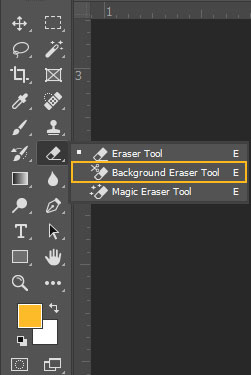
- Open your image in Photoshop.
- Now select the background erase tool from the left toolbar menu or you can press E to highlight directly.
- Select the brush tool and adjust its hardness according to the difficulties of your image subject edges.
- Now start by placing the brush at the center of the color that you want to remove and it will erase the color of the same hue. To delete different hues in your background, you need to sample your erase tool again and delete the color.
- Now select the Eraser tool from the toolbar to remove the background with fined edges.
- When done, go your work in the layer panel and fill the color as your own.
3. By Creating a Clipping Path
Last but not least, you can use the Pen tool to change your image background in Photoshop. The pen will work by creating clipping around the subject of your image and allowing you to separate the subject from the original background.
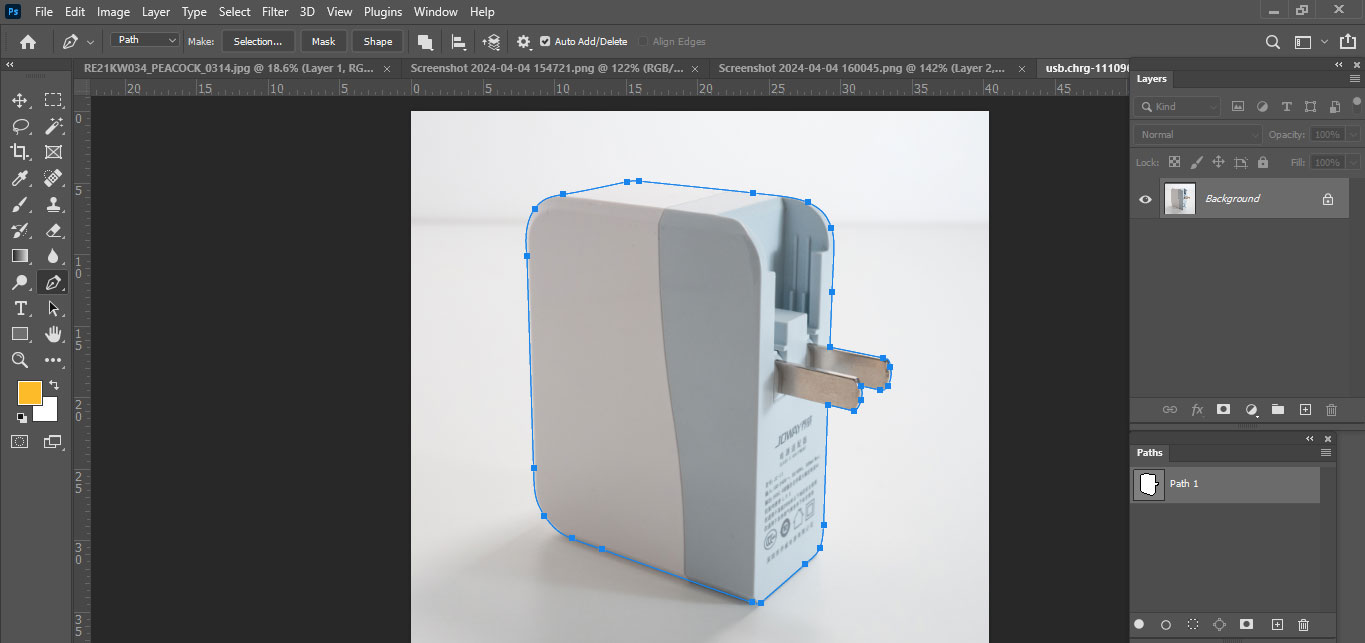
The process is enough effective when you have an image with intricate edges and or irregular shapes that are harder to separate from the background manually.
Though it is time-consuming to use the pen tool, you can preview our detailed guide on clipping path in Photoshop to make your task easier.
Changing Background To White In Photoshop
Now that you have a photo with a white background, and you just want to select it, this section will help you a lot. Here are a few effective tools in Photoshop you can utilize to remove the white background from your image:
Magic Wand Tool: This is the easy-to-operate tool in Photoshop, that you can use to change the background on any color including white. Select the tool from the toolbar menu or you can press W on your keyboard to quickly access it.

Now adjust the Tolerance level and drop the tool on the white background. It will select the white area and remove it.
Select and Mask: You can use the quick selection tool and Choose the Select and Mask option from the top bar menu to change any white background.
For instance, you may need to refine the edges with the brush tools. We’ve already included the detailed procedure above.
Lasso Tools: Unlike the magic wand tool, the Lasso tool is also workable to manually draw a selection around the subject to remove the white background.

Though it is a bit tricky to use this tool, I found it more effective than the magic wand tool for images with complex edges or with varying background shades.
Shortcut Key For Changing Background In Photoshop
Beyond removing and editing an image background, you can opt for shortcut keys in this instance. Knowing these shortcut keys will be enough for you to speed up the process of editing in Photoshop.
Some useful shortcut keys related to backgrounds include:
| Keyboard Shortcuts | Purpose |
| Ctrl + O | To open an image |
| W | To make a selection area with a “Quick selection tool” |
| Alt + Backspace (Windows) or Option + Delete (Mac) | To fill a layer with a different color |
| Ctrl + Backspace (Windows) or Command + Delete (Mac) | To fill the currently selected area or layer with the background color |
| Shift + Ctrl + I | To invert a selection |
| Ctrl + U | To directly select the hue and saturation menu. |
| G key | To open the paint bucket tool. |
| X key | Swaps foreground and background color. |
| D key | Reverse foreground and background color with the default settings |
| Hold Alt + click on the “Add Layer Mask” icon in the Layers panel. | To create a mask that hides the entire layer by default |
| Ctrl + I (Windows) or Ctrl + Command (Mac) | To invert the color of a layer |
Changing Photo Background Online
Beyond any doubt, changing the photo background in Photoshop is enough time-consuming especially if your image subject has complex edges or intricate details like hair or fur. In this case, you can take the best service online to get your job done quite easily.
Several photo editing services are available online that allow you to change backgrounds from any device with just an internet connection, no need to install software.
However, here is an ultimate list of the top photo editing services, with their key features and pricing details:
| Best photo background changer online | Key Features | Pricing Details |
| Path Foto | 24-hour support Unlimited revisions Good customer support Not a single touch of AI Powerful photo editing features | Starts at $0.29 per image |
| Fotor | AI-powered background changer Changes background through professionals 24/7 availability Quick file upload | Starts at $8.99 per month. |
| Clipping Magic | Powerful background changer Edit background with perfection Quick file upload Professional touch | Start with $3.99 per month for 15 credits |
| Photo Scissors | Remove complicated backgrounds easily Help to choose a custom background Advanced photo editing features Offers a DEMO version | Starts at $19.99 |
| inPixio Remove Background | Change background within a few seconds Quick upload Good customer support Easy to use Value for money | starts at US$49.99/year |
FAQs
Can I swap a background for an existing image in Photoshop?
Yes, you can swap for an existing image. Use any selection tool like Pen Tool, Lasso Tools, or Object Selection Tool and select the subject. After refining the edges, apply layer masks to hide the original background layer and place your subject on a new layer.
How can I get realistic shadows with the new background?
To get the shadows or reflections with your new background, you need to create new shadow layers below your subject and adjust their properties. Then use blending modes like “Multiply” or “Overlay” and edit your shadow as needed. Also, you can reduce the opacity to make it more natural.
How to get a clean selection without rough edges?
You can smooth the hard edges of your selection by singing anti-aliasing or feathering. Anti-aliasing will help you to soften the color transition between the edges and background pixels. Feathering will create the transition between the selection and surrounding pixels and blur the edges.
In Closing
In the ever-evolving realm of creativity, if you have a query on how I change the background in Photoshop, be sure you lack a very important technical process.
Photoshop is a powerful tool that offers a versatile method to change the backgrounds of any image. You just need to know the right way to handle the tools.
After thoroughly reading our comprehensive guide, hope now you can easily handle any project whether it’s a straightforward product shot or a complex subject with intricate details.
As a final piece of advice, I will recommend being more careful while using the selection and masking tool in Photoshop and taking time to refine your selection for a seamless composite. Happy editing!